
Learning how to brew kombucha at home is easier than most beginners think, and it’s one of the most rewarding DIY kitchen projects you can try. This fermented tea drink has become incredibly popular across the U.S., not only for its tangy, refreshing flavor but also for its natural probiotics and digestive benefits. Although kombucha may seem intimidating at first, the brewing process is simple once you understand the basic ingredients, the right ratios, and the steps that guide fermentation.
Kombucha’s rise in the wellness world has encouraged many home brewers to explore other functional drinks as well. If you’re already curious about gut-friendly beverages, don’t miss our soothing chaga mushroom tea recipe.
In this complete guide, you’ll learn everything from what kombucha is, how fermentation works, and the exact steps to make your first batch. We’ll break down brewing times, flavoring options, SCOBY care, and beginner troubleshooting so you can avoid the mistakes most newcomers make. You’ll also learn how to adjust your kombucha recipe for 1 litre or 2 litres, how much tea and sugar to use, and how to grow your own SCOBY from scratch if you don’t already have one.
By the end, you’ll know how to brew kombucha confidently and safely at home—and even experiment with fun, fizzy flavors during the second fermentation stage.
What Is Kombucha? Understanding the Fermented Tea Drink
The History and Origins of Kombucha
Although kombucha has become a modern wellness staple, its history stretches back more than 2,000 years. Most historians trace its origins to Northeast China, where fermented tea was prized for its energizing and digestive benefits. Over time, kombucha spread across Russia and Eastern Europe, eventually reaching the United States, where the drink experienced a massive surge in popularity in the early 2000s. Today, learning how to brew kombucha at home has become almost as common as making sourdough, thanks to its simplicity, affordability, and probiotic-rich profile. Even better, homemade kombucha often tastes fresher and cleaner than many store-bought options.
Why Kombucha Became Popular in the U.S.
Kombucha’s rise in the American wellness scene came at the perfect moment. Consumers were searching for natural ways to support gut health, reduce sugary drink consumption, and explore fermented foods. Because kombucha contains organic acids, mild carbonation, and a refreshing tart-sweet balance, it became a go-to alternative to soda or energy drinks. People quickly realized that making kombucha at home costs just pennies per bottle compared to commercial brands. As more U.S. households learned how to make kombucha for beginners, the fermented tea movement exploded across blogs, farmers’ markets, and home kitchens.
Key Ingredients: Tea, Sugar, SCOBY, and Starter Tea
Although kombucha tastes complex, it requires only four simple ingredients. First, you need real tea—usually black or green tea—because the bacteria and yeast depend on its nutrients. Second, sugar fuels the fermentation process, though most of it is consumed by the SCOBY. Third, the SCOBY itself (a Symbiotic Culture of Bacteria and Yeast) transforms sweet tea into tangy kombucha through fermentation. Finally, starter tea ensures the environment is acidic enough to prevent harmful bacteria from growing. When these ingredients work together, they create the naturally fizzy fermented drink that’s now a kitchen favorite for anyone interested in brewing kombucha safely at home.
How Kombucha Fermentation Works
The Science Behind SCOBY Fermentation
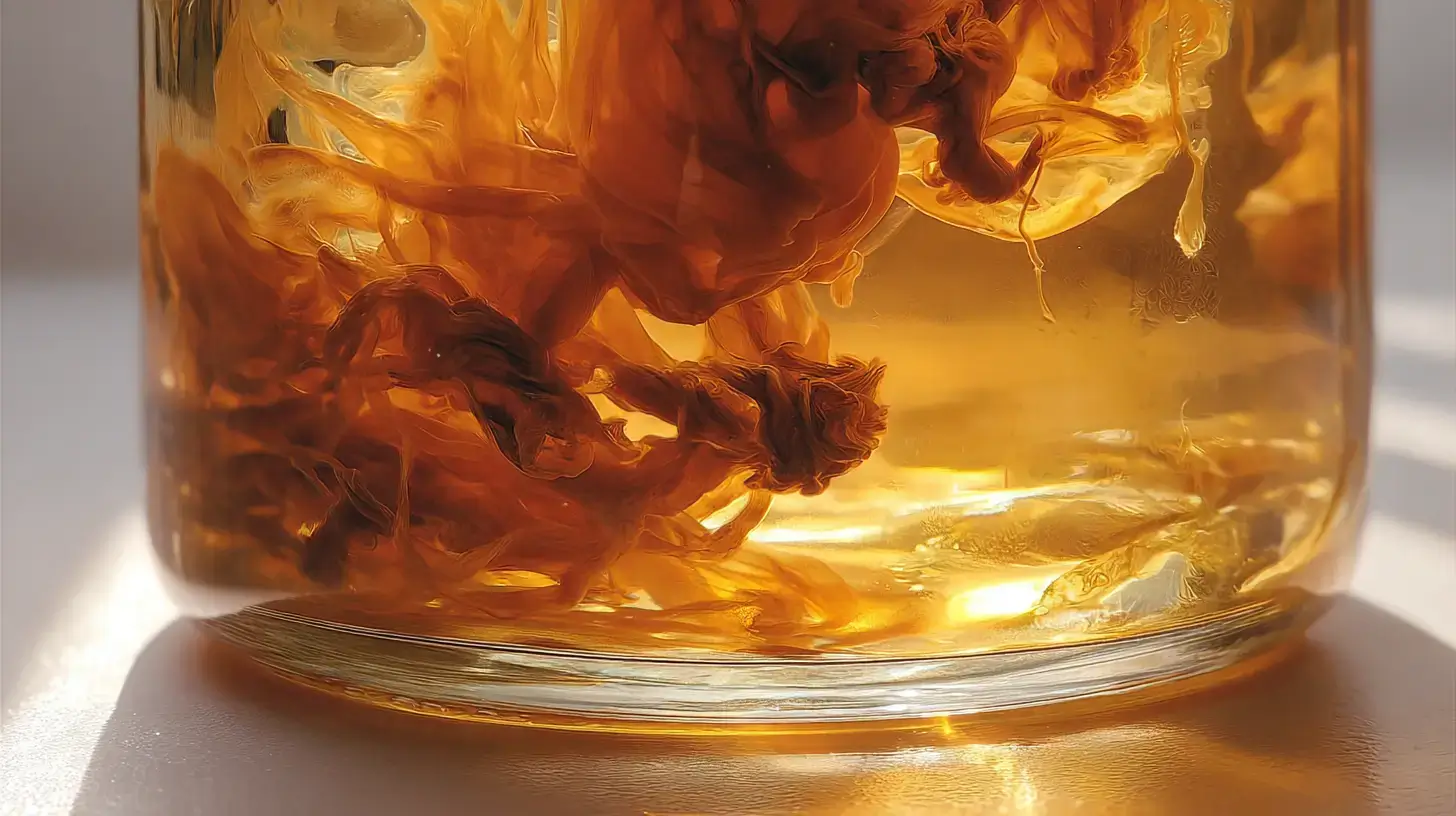
To understand how to brew kombucha successfully, it helps to know what happens inside the jar. A SCOBY—short for Symbiotic Culture of Bacteria and Yeast—creates the perfect ecosystem for transforming sweet tea into a tangy, probiotic-rich drink. During fermentation, yeast within the SCOBY breaks down sugar into alcohol. Then, specific bacteria convert that alcohol into organic acids, which give kombucha its signature flavor and natural acidity. This balance of yeast and bacteria is delicate, yet incredibly efficient. When the environment stays clean, oxygen-rich, and properly warmed, the SCOBY thrives and produces consistent batches of kombucha tea.
First Fermentation vs. Second Fermentation
Although many people think kombucha is a single-step process, there are actually two stages. The first fermentation is where the SCOBY sits in sweet tea for several days, slowly converting it into kombucha. This stage determines the drink’s acidity, sweetness, and base flavor. Once the tea reaches your preferred taste—usually slightly tart but not overly sour—you move on to the second fermentation. During this step, the kombucha is bottled without the SCOBY and flavored with fruits, herbs, or juices. Because sugar from the flavorings feeds the yeast, this stage naturally creates carbonation. That’s why homemade kombucha often tastes fresher and fizzier than store-bought varieties. Even beginners find that once they understand these two stages, brewing kombucha becomes far less intimidating.
How Temperature Affects Brewing Results
Temperature matters more than most beginners realize. Kombucha ferments best between 75°F and 85°F. When it’s too cold, fermentation slows, resulting in weak, overly sweet kombucha with little carbonation. But when temperatures climb too high, the SCOBY can become stressed, producing harsh flavors or overly acidic tea. By keeping your brewing area within the ideal range, you can develop predictable flavor, proper SCOBY growth, and steady carbonation. Many home brewers use warming mats during winter, while others store their jars inside kitchen cabinets where temperatures stay consistent. Once you understand how temperature shapes fermentation, you’ll find it easier to adjust ratios and timing for perfectly balanced kombucha every time.
How to Brew Kombucha (Primary Keyword Section)

Safety note
Fermented beverages should be prepared carefully to avoid contamination.
Step-by-Step Kombucha Brewing Instructions for Beginners
If you’ve been wanting to learn how to brew kombucha at home, this is the simplest place to start. The process may look technical at first, but once you make your first batch, you’ll see just how forgiving and beginner-friendly kombucha brewing really is. First, boil your water and steep your tea. While the tea is still warm, dissolve the sugar completely, then let the mixture cool to room temperature. This step matters because hot tea can damage your SCOBY. Once cooled, pour the tea into a clean glass jar. Add your SCOBY along with the starter tea, which lowers the pH and protects the ferment from unwanted bacteria. Cover the jar with a breathable cloth and secure it with a rubber band. After that, simply place the jar somewhere warm and out of direct sunlight. Within a few days, you’ll notice your SCOBY thickening as fermentation begins.
Tools, Jars, and Equipment You Need
Although kombucha has a complex flavor, you don’t need complicated equipment to get started. A wide-mouth glass jar is ideal because it allows oxygen to circulate, helping the SCOBY grow evenly. Cloth covers, such as tightly woven cotton or paper towels, prevent dust or insects from entering while still letting the brew breathe. You’ll also need a wooden or plastic spoon, a kettle, brewing thermometers (optional but helpful for beginners), and flip-top bottles for the second fermentation. Many newcomers purchase a kombucha starter kit, but you can easily source everything yourself. Just remember: avoid metal containers during fermentation because certain metals react with the acidic tea. With these simple tools in place, brewing kombucha becomes a smooth, repeatable process.
Best Tea and Sugar Choices for Fermenting Kombucha
Choosing the right ingredients makes a noticeable difference in flavor and fermentation speed. Most brewers rely on black tea because it provides the nutrients bacteria and yeast need to thrive. Green tea creates a lighter, floral kombucha, while oolong offers a mellow, balanced brew. However, herbal teas should be avoided during the base fermentation stage because they don’t contain the essential compounds that support SCOBY growth. When it comes to sugar, stick with plain white cane sugar. Although alternatives like honey, coconut sugar, or stevia may sound appealing, they can disrupt fermentation or harm the SCOBY. Since the SCOBY consumes most of the sugar anyway, it’s best to use the standard sugar-tea combination, especially if you’re learning how to make kombucha for beginners. Once you master the basics, you can experiment with other ingredients during the second fermentation where flavors truly shine.
Print
How to Brew Kombucha (Beginner-Friendly Homemade Guide)
- Total Time: 7–16 days
- Yield: Approximately 8 cups (2 litres) 1x
Description
Learn how to brew kombucha at home with this simple, beginner-friendly recipe. This guide walks you through making sweet tea, fermenting with a SCOBY, and flavoring during the second fermentation. Perfect for beginners who want a consistent, fizzy, probiotic-rich kombucha every time.
Ingredients
- For a 1-Litre Batch:
- 4 tea bags (black or green tea) or 8–10 g loose tea
- 50–65 g white sugar (about 1/4 cup)
- 1 litre filtered water
- 1 cup starter tea (plain kombucha)
- 1 SCOBY
- For a 2-Litre Batch:
- 8 tea bags or 16–20 g loose tea
- 100–130 g white sugar (about 1/2 cup)
- 2 litres filtered water
- 2 cups starter tea
- 1 SCOBY (mature or thick)
- Optional (Second Fermentation Flavors):
- Fresh fruit: berries, mango, lemon, ginger
- Herbs: mint, basil
- Spices: cinnamon, cardamom
- Extra 1–2 tsp sugar or honey (boosts carbonation)
Instructions
- Make the Sweet Tea:
- Bring water to a boil.
- Add tea bags or loose tea and steep for 5–7 minutes.
- Remove tea bags or strain loose tea.
- Stir in sugar until fully dissolved.
- Cool completely to room temperature.
- Start the First Fermentation:
- Pour cooled sweet tea into a clean glass jar.
- Add SCOBY and starter tea.
- Cover jar with cloth and secure with a rubber band.
- Ferment in a warm spot (75–85°F) for 7–14 days.
- Taste-test starting on day 5.
- Second Fermentation (Optional):
- Remove SCOBY and set aside with 1–2 cups starter tea.
- Bottle kombucha in airtight bottles.
- Add fruit, herbs, or spices.
- Seal and ferment at room temperature for 2–5 days to carbonate.
- Burp bottles daily.
- Refrigerate when desired fizz is reached.
- Serve & Store:
- Keep refrigerated for up to 4 weeks.
- Open slowly due to natural carbonation.
Notes
Use real tea—black and green tea work best for SCOBY health. White cane sugar provides the most reliable fermentation. SCOBY may float, sink, or tilt—this is normal. Discard the batch if you see fuzzy mold (blue, green, white, or black). Overly sour kombucha can be used as vinegar or starter tea.
- Prep Time: 10 minutes
- Cook Time: 10 minutes
- Category: Beverages / Fermented Drinks
- Method: Fermentation
- Cuisine: American, Global
Nutrition
- Serving Size: 8 oz (240 ml)
- Calories: 25
- Sugar: 5–6 g
- Sodium: 5 mg
- Fat: 0 g
- Saturated Fat: 0 g
- Unsaturated Fat: 0 g
- Trans Fat: 0 g
- Carbohydrates: 6 g
- Fiber: 0 g
- Protein: 0 g
- Cholesterol: 0 mg
Keywords: how to brew kombucha, homemade kombucha, kombucha recipe, kombucha for beginners, kombucha fermentation, SCOBY recipe
Kombucha Brewing Ratios and Measurements
How Much Tea for 1 Litre of Kombucha?
Getting the right ratio is one of the most important steps when learning how to brew kombucha. Even a small change in tea strength can affect the acidity and overall taste of your final brew. For a 1-litre kombucha recipe, the standard formula is 2–3 grams of loose-leaf tea (or 1 tea bag) per cup of water, which equals 4 tea bags or about 8–10 grams of loose tea per litre. This amount creates a strong enough tea base to nourish the SCOBY and support proper fermentation. If you use too little tea, the kombucha may taste weak or overly sweet. However, too much tea can make the brew bitter. Sticking to this simple ratio ensures consistency whether you’re brewing kombucha for the first time or adjusting the flavor of your regular batches.
Kombucha Recipe 1 Litre & Kombucha Recipe 2 Litres
Because many beginners start with small batches, here are the two most common recipe ratios:
Kombucha Recipe – 1 Litre
- 4 tea bags (or 8–10 grams loose tea)
- 50–65 grams of white sugar (about 1/4 cup)
- 1 cup starter tea
- 1 SCOBY
Kombucha Recipe – 2 Litres
- 8 tea bags (or 16–20 grams loose tea)
- 100–130 grams of white sugar (about 1/2 cup)
- 2 cups starter tea
- 1 SCOBY (or a thicker, more mature one)
These ratios follow the same foundation, making it easy to scale up as you grow more confident. Most people find that doubling the recipe produces more stable fermentation because larger volumes hold temperature better. Yet starting with a single litre lets you taste-test sooner and refine your process before moving to bigger batches.
Understanding the Tea-to-Sugar Ratio for Consistent Fermentation
Every kombucha brewer eventually discovers that ratios are the backbone of fermentation. Although recipes can vary, the classic guideline is 1 cup of sugar per gallon of sweet tea, which converts to 50–65 grams of sugar per litre. This range is ideal because the SCOBY needs enough sugar to fuel fermentation without leaving the final brew overly sweet. Another simple rule: 1 tea bag per cup of water, or its loose-leaf equivalent. Keeping these numbers consistent helps the SCOBY produce the right balance of organic acids, carbonation, and tang. Whenever your kombucha tastes too sharp or too mild, adjusting the tea-to-sugar ratio is often the easiest way to fix it. With a bit of practice, you’ll recognize how these measurements shape flavor and fermentation time, ultimately improving every batch you make.
How to Make or Grow a SCOBY
How to Make Kombucha SCOBY at Home
If you want to learn how to brew kombucha from scratch, understanding how to grow your own SCOBY is incredibly helpful. A SCOBY (Symbiotic Culture of Bacteria and Yeast) is the heart of the fermentation process. Although you can buy a SCOBY online, many beginners prefer making one at home because it’s inexpensive and surprisingly simple. To create a SCOBY, pour a bottle of raw, unflavored store-bought kombucha into a clean jar, then add a cup of sweetened tea. Cover the jar with a breathable cloth and let it sit at room temperature for about one to three weeks. Over time, you’ll notice a thin, jelly-like film forming on the surface. This layer eventually thickens into a healthy, usable SCOBY. Once it reaches at least 1/4 inch in thickness, it’s strong enough to start your first batch of homemade kombucha.
How to Brew Kombucha Without a SCOBY (Alternative Methods)
Although traditional recipes depend on a SCOBY, some brewers want to know how to make kombucha without a SCOBY. Technically, it’s possible because the bacteria and yeast in raw kombucha naturally create one during fermentation. To use this method, simply start a batch with sweet tea and a generous amount of raw, unpasteurized kombucha as your starter liquid. As the mixture ferments, a new SCOBY will develop on top. However, this approach takes longer and doesn’t always produce consistent results for beginners. If you’re brewing kombucha for the first time, growing a SCOBY intentionally or purchasing a mature one is typically the safer choice. Once you gain confidence, experimenting with SCOBY-free methods becomes easier and more predictable.
What to Do If Your SCOBY Sinks, Floats, or Changes Shape
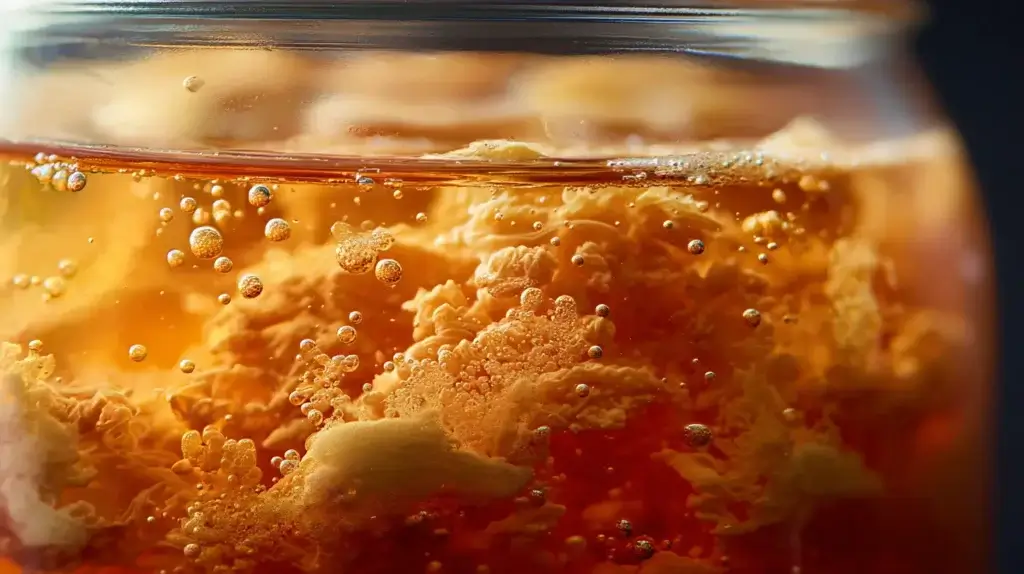
A common beginner concern is that the SCOBY doesn’t always behave the same way. Sometimes it floats, sometimes it sinks, and sometimes it tilts sideways in the jar. Fortunately, all of these positions are completely normal. The SCOBY adjusts based on density, temperature, and how much starter tea you added. Even if it sinks, a new layer almost always forms at the top during fermentation. What matters more is appearance and smell. A healthy SCOBY is creamy white to light brown, with a firm, rubbery texture. Small yeast strands at the bottom of the jar are harmless. However, fuzzy spots, blue-green patches, or dry-looking mold indicate contamination, and in those cases you must discard the entire batch. Once you understand how a SCOBY behaves, you’ll feel far more confident managing each stage of the brewing process.
First Fermentation — Time, Temperature, and Flavor
How Long Do You Brew Kombucha?
When beginners first learn how to brew kombucha, one of the most confusing steps is figuring out exactly how long the first fermentation should last. Although recipes often suggest a fixed number of days, fermentation time depends on temperature, batch size, and personal taste. Generally, kombucha brews for 7 to 14 days during the first fermentation. Warmer kitchens speed up the process, creating a tangier brew in less time, while cooler environments slow it down. The best approach is to begin taste-testing on day 5. Use a clean straw to sip a small amount from the jar. If it’s still too sweet, let it continue fermenting. If it’s mildly tart with a hint of sweetness, you’ve reached the perfect stage to bottle it for the second fermentation.
How to Taste-Test Kombucha for the Right Acidity
Because kombucha flavor changes quickly during fermentation, tasting the brew is essential. When kombucha is young—around days 3 to 5—it tastes like sweet tea with a subtle tang. As yeast and bacteria convert sugar into acids, the flavor becomes sharper and more complex. By days 7 to 10, most batches strike the ideal balance: slightly sweet, pleasantly acidic, and ready for bottling. If the kombucha becomes too sour, it simply means the fermentation went on too long. While you can still use over-fermented kombucha to start a new batch or turn it into vinegar, precise taste-testing ensures a consistent flavor every time. The more batches you brew, the easier it becomes to identify the exact acidity you prefer.
Common First-Ferment Problems (and How to Fix Them)
Even though first fermentation is straightforward, beginners often run into a few predictable issues. One of the most common problems is slow fermentation. This usually happens when the room is too cool. Placing the jar in a warmer area—or using a simple heating mat—helps stabilize the process. Another issue is weak flavor, which often results from using too little tea or too much water. Following the correct tea-to-sugar ratio ensures your kombucha ferments properly and tastes full-bodied. Cloudiness is also normal, usually caused by yeast activity. However, visible mold is not normal and requires discarding the entire batch. When you learn how to make kombucha at home consistently, you’ll quickly recognize the difference between harmless variations and real concerns. Thankfully, most issues are easy to prevent with the right ratios and a stable brewing temperature.
Second Fermentation — Flavoring & Carbonation

How to Flavor Kombucha (Fruit, Herbs, and Spices)
Once you’ve mastered how to brew kombucha during the first fermentation, the fun really begins. The second fermentation is when you transform plain kombucha into something vibrant and personalized. To start, remove the SCOBY and set it aside with enough starter tea for your next batch. Pour the finished kombucha into clean, airtight bottles, leaving about an inch of headspace at the top. This is where you can add fresh fruit, fruit purée, herbs, spices, or even a splash of juice. Popular options include strawberries, mango, ginger, lemon, blueberries, and mint. Because fruit contains natural sugars, it feeds the remaining yeast, which boosts carbonation. The key is balance: too much fruit can lead to excess pressure, while too little may create a flat drink. Over time, you’ll discover your favorite combinations and develop a predictable flavor system that works for every batch.
How to Increase Natural Carbonation
Homemade kombucha is known for its lively fizz, but carbonation doesn’t happen automatically. It forms when yeast consumes leftover sugars during the second fermentation, producing natural CO₂. To enhance this effect, use sturdy, swing-top bottles that trap gas effectively. Keep the bottles at room temperature for 2 to 5 days, checking them daily for pressure. Warmer temperatures speed up carbonation, while cooler rooms slow it down. If you prefer stronger fizz, add a teaspoon of sugar or a few extra pieces of fruit to each bottle before sealing it. Just remember: carbonation builds quickly, and bottles can burst if pressure becomes too high. Burping the bottles—opening them briefly to release excess gas—prevents accidents while still giving you bubbly, flavorful kombucha.
Kombucha Bottling Tips for Safety and Fizz
The bottling stage is exciting, but it also requires care. Always use thick, glass bottles designed for carbonation. Avoid reusing cheap or lightweight bottles, especially those from store-bought juices, because they can crack under pressure. Fill the bottles almost to the top, leaving just enough space for gas buildup. If you’re experimenting with bold flavors like pineapple, ginger, or berries, strain out large chunks before drinking to prevent clogging and uneven fermentation. Store the bottles upright during carbonation so sediment settles at the bottom. After the carbonation reaches your desired level, refrigerate the bottles to slow fermentation and lock in the fizz. With these simple practices, the second fermentation becomes predictable, safe, and incredibly rewarding for anyone learning how to make kombucha for beginners.
Health Benefits and Safety Tips
Kombucha Benefits Backed by Research
As more people learn how to brew kombucha at home, they often discover that the drink offers more than just great flavor. Kombucha contains organic acids, antioxidants, and naturally occurring probiotics that may support gut health and digestion. Although research is still growing, studies suggest that kombucha’s fermentation process produces compounds that help balance gut bacteria, which may improve nutrient absorption and overall digestive comfort. Because homemade kombucha is unpasteurized, it typically contains more live cultures than many commercial brands. Additionally, the tea base—especially if you use green tea—provides polyphenols that may help reduce oxidative stress. While kombucha isn’t a miracle cure, it’s a refreshing way to add beneficial microbes and plant compounds to your daily routine.
How Much Kombucha You Should Drink Per Day
When people first start drinking kombucha, they often wonder how much is considered safe or beneficial. Most experts recommend beginning with 4 ounces per day to see how your body responds. Because kombucha is acidic and contains live cultures, drinking too much too quickly can cause bloating or stomach discomfort in some individuals. After a week or two, you can gradually increase your intake to 8–12 ounces per day—about one standard bottle. Moderation helps you enjoy kombucha’s benefits without overwhelming your system. Even seasoned brewers who regularly make homemade kombucha typically stick to one or two servings per day. Keeping portions reasonable also helps balance sugar intake, even though much of the sugar is consumed during fermentation.
Signs Your Kombucha Is Bad (When to Throw It Out)
Although kombucha is generally safe to make at home, you still need to watch for signs of contamination. A healthy batch should smell slightly sweet, tangy, or vinegary—not rotten, sour-milk-like, or harshly chemical. The SCOBY may change shape or color slightly during fermentation, but fuzzy mold is an immediate red flag. Mold appears blue, green, white, or black and usually grows on the surface in dry-looking clusters. If you ever see mold, discard the entire batch, including the SCOBY. Another sign of spoiled kombucha is an unusually slimy or stringy texture that persists throughout the entire liquid, not just near the SCOBY. Overly sour kombucha isn’t dangerous; it just means the fermentation went too long, and the brew turned into vinegar. You can still use it as a cleaning solution, a salad dressing base, or starter tea for a fresh batch. By learning to recognize what healthy kombucha looks, tastes, and smells like, you can brew confidently and safely every time.
Similar Wellness Drinks You May Also Like
Many people who learn how to brew kombucha naturally become curious about other functional drinks that support digestion, energy, and overall wellness. Although kombucha is unique because of its fermentation process, several other beverages offer their own set of benefits and can complement a healthy routine. Here are some great options to explore next.
Chaga Mushroom Tea
For another soothing, nutrient-rich drink, try our simple chaga mushroom tea recipe.
Chaga tea is known for its earthy flavor and antioxidant properties, making it a comforting choice for cold mornings or relaxing evenings.
Ryze Mushroom Coffee
If you enjoy functional drinks with both flavor and purpose, don’t miss our guide to Ryze mushroom coffee .
This blend adds adaptogenic mushrooms to your daily brew for smoother energy and fewer jitters than traditional coffee.
Costa Rican Tea for Weight Loss
Looking for something light and refreshing? Explore Costa Rican tea for weight loss .
This herbal infusion is popular for supporting digestion and hydration, especially if you’re focused on wellness goals.
Jamu Juice Recipe
Curious about traditional tonics? Try our bright and invigorating Jamu juice recipe .
Made from turmeric, ginger, and citrus, this Indonesian drink offers immune-supporting ingredients with a punch of flavor.
Lemon Ginger Coffee
For an energizing twist on your morning routine, learn how to make lemon ginger coffee.
This simple combination adds digestive-friendly ingredients to a coffee base for a surprising burst of freshness.
Lemon Ginger Coffee Benefits
To understand why this blend has become so popular, discover the full lemon ginger coffee benefits .
It’s a unique drink worth trying if you’re exploring new ways to support digestion and energy.
LMNT Electrolyte Drink Benefits
If hydration is your priority, here’s our detailed guide to the LMNT electrolyte drink benefits .
This mineral-rich mix helps support hydration, especially during workouts, hot weather, or fasting days.
Frequently Asked Questions About Brewing Kombucha
How do you brew kombucha at home for beginners?
To brew kombucha at home, start by making a strong sweet tea using black or green tea and white sugar. Let the tea cool to room temperature before adding your SCOBY and starter tea. Cover the jar with a breathable cloth and let it ferment for 7 to 14 days in a warm, dark location. Taste the kombucha periodically until it reaches the level of sweetness and acidity you prefer. Once ready, remove the SCOBY and bottle the kombucha for the second fermentation if you want fizz and flavor.
How long should kombucha ferment during the first brew?
Most batches ferment for 7 to 14 days, depending on room temperature, tea strength, and your taste preferences. Warmer temperatures speed up the process and create a tangier brew, while cooler rooms slow fermentation. Begin taste-testing around day 5 to monitor flavor development and avoid over-fermenting the kombucha.
What is the correct tea-to-sugar ratio for kombucha?
A reliable kombucha ratio is 1 cup of sugar per gallon of tea, which translates to 50–65 grams of sugar per litre. For tea, use 1 tea bag per cup of water, or about 8–10 grams of loose tea per litre. These ratios help your SCOBY stay healthy while producing consistent acidity, carbonation, and flavor throughout the fermentation process.
Can you make kombucha without a SCOBY?
Yes, you can make kombucha without a SCOBY by using raw, unpasteurized kombucha as your starter. When mixed with sweet tea, the bacteria and yeast in the raw kombucha will naturally grow a new SCOBY during fermentation. However, the process takes longer and isn’t always predictable for beginners. Most new brewers find it easier to start with a fully formed SCOBY.
How much tea for 1 litre of kombucha?
For a 1-litre batch, you need 4 tea bags or 8–10 grams of loose-leaf tea. This creates a strong enough brew to nourish the SCOBY and support proper fermentation. Using too little tea can result in weak, overly sweet kombucha, while too much tea may cause bitterness.
What tea works best for brewing kombucha?
Black tea remains the most consistent choice because it provides the nutrients that help yeast and bacteria thrive. Green tea creates a lighter, more floral kombucha, while oolong offers a mellow balance between the two. Avoid herbal teas during the first fermentation since they lack the compounds needed to support healthy SCOBY development.
Conclusion
Learning how to brew kombucha at home is far simpler than most beginners imagine, and once you understand the basic ratios, fermentation timelines, and SCOBY care, the process becomes second nature. Whether you’re brewing a 1-litre batch for the first time or scaling up to larger volumes, kombucha is a flexible, forgiving drink that lets you experiment with flavors, carbonation levels, and brewing techniques until you find your perfect balance. Plus, homemade kombucha often tastes fresher and more vibrant than store-bought options, all while costing just pennies per bottle.
As you continue brewing, don’t be afraid to adjust your tea strength, fermentation length, or second-ferment flavors. Every home environment is slightly different, and those small variations help you develop a brewing style that fits your taste. If you want to explore other energizing wellness drinks that complement kombucha, you might also enjoy our guide to Ryze mushroom coffee . It’s another popular option for anyone building a healthy, functional drink routine at home.
Mastering kombucha is ultimately about understanding the fermentation process, trusting your senses, and refining your technique with each batch. With the right ingredients, a reliable SCOBY, and a bit of patience, you’ll be able to craft delicious, fizzy, probiotic-rich kombucha anytime you want.
About the author
This guide was written by a food content creator specializing in fermentation and functional beverages.