
Making how to make jalebi at home a reality in your own kitchen is easier than you might think. This iconic Indian dessert, famous for its bright golden spirals and sticky sugar syrup coating, delivers that perfect mix of crispy outside and juicy inside. And honestly, once you get the batter right and understand the syrup consistency, you’ll see that homemade jalebi isn’t complicated at all.
Jalebi is a beloved street food across India and South Asia. Traditionally deep-fried in coiled shapes and soaked in fragrant sugar syrup flavored with cardamom and sometimes rose water, this sweet treat is often served during festivals, weddings, and weekend breakfasts. However, you don’t need a special occasion to enjoy it. With simple pantry ingredients like flour, yogurt, sugar, and a little patience for fermentation, you can recreate that authentic taste right at home.
In this complete guide, you’ll learn exactly how to make jalebi at home step by step. We’ll cover the traditional fermented method, the instant version, tips for achieving crispy texture, common mistakes to avoid, and even delicious variations like kesar jalebi and rabri jalebi. By the end, you’ll feel confident piping those perfect spirals and mastering the one-string syrup stage like a pro.
If you enjoy rich, syrup-soaked desserts, you might also like our mounds cake recipe for another indulgent treat with deep, satisfying flavor.
Let’s dive in and start making perfectly crispy, golden jalebi from scratch.
What Is Jalebi?
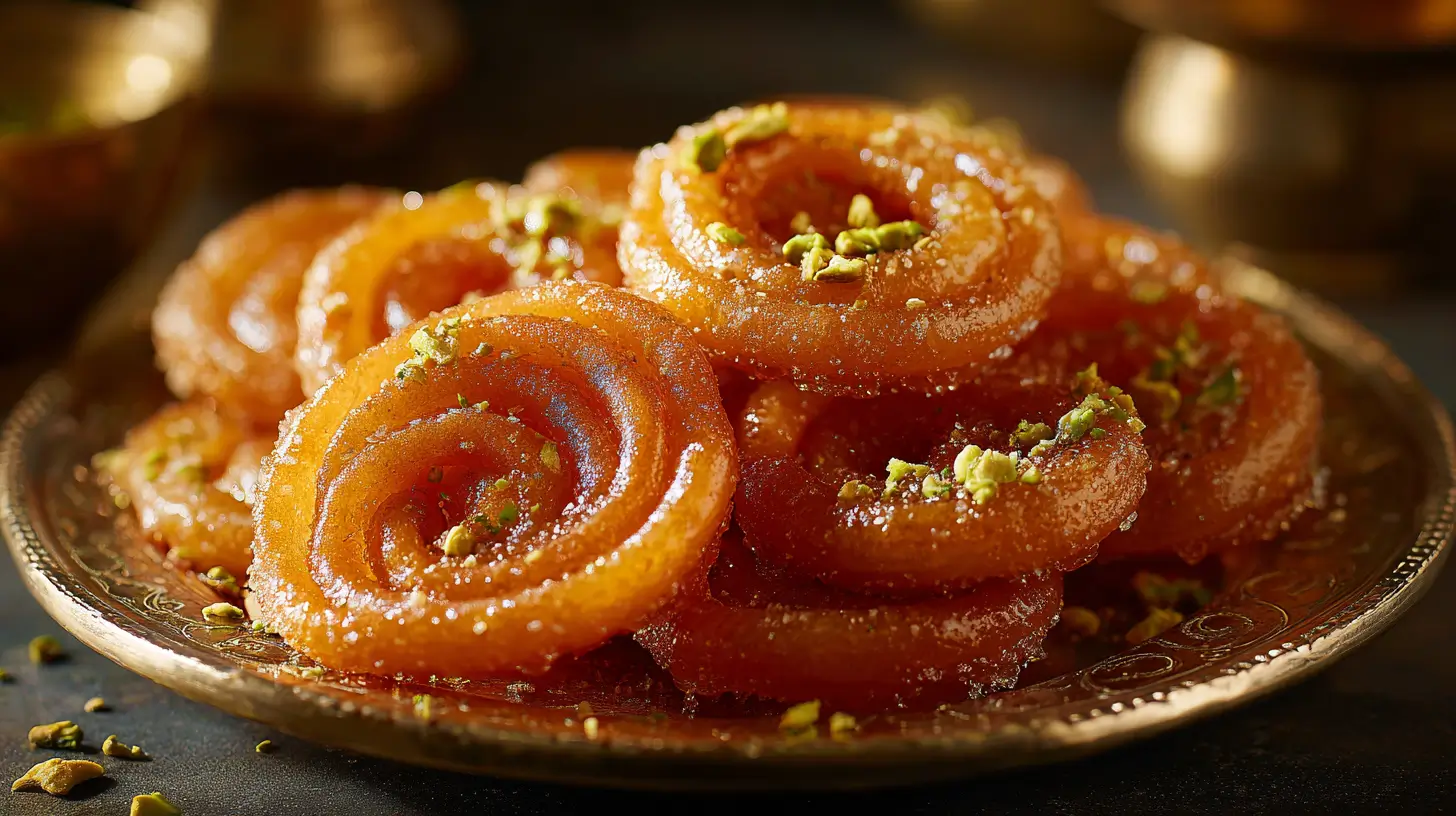
Jalebi is a traditional Indian sweet made by deep-frying fermented batter into spiral shapes and soaking them in warm sugar syrup. When people search for how to make jalebi at home, they’re usually craving that irresistible contrast: a crisp, lightly tangy exterior with a juicy, syrup-filled center. And yes, when done right, homemade jalebi tastes just like the ones sold by street vendors.
The Origins of Jalebi in India and South Asia
Although jalebi is deeply associated with India today, its roots trace back centuries. Historical records suggest that similar syrup-soaked fritters appeared in the Middle East before becoming popular across South Asia. Over time, jalebi evolved into a beloved Indian festival dessert, especially during Diwali, Eid, and wedding celebrations.
Across regions, the preparation may vary slightly. In North India, jalebi is often served hot with milk or rabri. In some areas, it’s thicker and more chewy, while in others, it’s thin and extra crispy. Regardless of the variation, the core concept remains the same: fermented batter, hot oil, and fragrant sugar syrup.
Jalebi as a Popular Street Food Dessert
Walk through any busy Indian market early in the morning, and you’ll likely spot a large kadhai filled with bubbling oil. Street vendors pipe batter directly into hot oil, creating beautiful spiral patterns in seconds. The freshly fried jalebi is then dipped into chashni (sugar syrup) and served immediately.
What makes jalebi such a popular street food?
- It’s affordable
- It’s freshly made
- It pairs well with tea or milk
- It’s both breakfast and dessert
Interestingly, many families now prefer learning how to make jalebi at home so they can enjoy this deep-fried spiral sweet without stepping outside.
What Makes Jalebi Crispy and Syrupy?
The magic of crispy jalebi lies in three essential elements:
| Component | Why It Matters | Result |
|---|---|---|
| Fermented batter | Creates slight tang and airy texture | Light, crisp exterior |
| Proper oil temperature | Ensures even frying | Golden color, no sogginess |
| 1-string sugar syrup | Perfect syrup thickness | Balanced sweetness |
First, fermentation gives the batter a mild tang and structure. Then, frying at the right temperature (around 350°F) creates that golden crunch. Finally, soaking the hot jalebi in warm syrup allows it to absorb sweetness without becoming mushy.
When all three factors align, you get authentic jalebi texture—crispy on the outside, syrupy on the inside.
Now that you understand what jalebi is and why it’s so special, let’s move on to the ingredients you’ll need to start making jalebi at home from scratch.
Ingredients for Homemade Jalebi
Before you truly master how to make jalebi at home, you need to understand the role of each ingredient. While jalebi looks fancy and intricate, the ingredient list is surprisingly simple. In fact, most of what you need is already sitting in your pantry.
That said, precision matters. Because jalebi depends on fermentation, frying, and syrup absorption, every component plays a specific role in achieving that crispy, golden texture.
Ingredients for the Jalebi Batter
The batter is the foundation of this homemade jalebi recipe. It should be smooth, slightly thick, and pourable—similar to pancake batter but a bit more elastic.
Here’s what you’ll need:
| Ingredient | Purpose |
|---|---|
| All-purpose flour | Provides structure |
| Cornstarch | Adds crispiness |
| Yogurt | Helps fermentation & slight tang |
| Baking soda | Lightens texture |
| Turmeric | Natural golden color |
| Water | Adjusts consistency |
All-purpose flour forms the base of the batter. It gives jalebi its body and helps maintain the spiral shape during frying.
Cornstarch is the secret weapon for crispy jalebi. It reduces gluten density, which makes the final texture lighter and crunchier.
Yogurt is essential in the traditional fermented jalebi method. It introduces natural bacteria that help develop that subtle tangy flavor.
Baking soda works as a mild leavening agent. It creates tiny air bubbles, making the fried spirals airy instead of dense.
Turmeric is used in very small amounts—just enough to create that signature golden color without affecting flavor.
Finally, water is added gradually to achieve a thick yet pipeable consistency. If the batter is too thin, the spirals won’t hold their shape. If it’s too thick, piping becomes difficult.
Ingredients for the Sugar Syrup (Chashni)
If the batter creates the structure, the sugar syrup gives jalebi its soul. Without properly prepared chashni, your jalebi won’t have that glossy, sticky coating.
| Ingredient | Purpose |
|---|---|
| Sugar | Sweet base |
| Water | Dissolves sugar |
| Cardamom | Adds aroma |
| Lemon juice | Prevents crystallization |
| Rose water (optional) | Floral fragrance |
Sugar and water form the base. The key is achieving a one-string consistency—meaning when you stretch a drop of syrup between two fingers, it forms a thin string.
Cardamom adds warmth and depth, making the syrup fragrant rather than overly sweet.
Lemon juice prevents the syrup from crystallizing. Even a few drops make a big difference.
Rose water is optional but traditional. It adds that unmistakable Indian dessert aroma that elevates the flavor profile.
Quick Ingredient Checklist
For easy reference, here’s everything you’ll need:
For Batter
- 1 cup all-purpose flour
- 2 tablespoons cornstarch
- ½ cup plain yogurt
- ½ teaspoon baking soda
- Pinch of turmeric
- Water (as needed)
For Sugar Syrup
- 1 cup sugar
- ½ cup water
- 2–3 crushed cardamom pods
- ½ teaspoon lemon juice
- ½ teaspoon rose water (optional)
Now that your ingredients are ready, it’s time to move to the most important section—how to make jalebi at home step by step, from batter preparation to frying and soaking.
Step-by-Step: How to Make Jalebi at Home
Now comes the fun part. If you’ve been wondering exactly how to make jalebi at home, this section walks you through every single step. Although jalebi may look complicated, the process becomes simple once you break it down.
Follow each stage carefully, and you’ll get crispy, golden spirals soaked in perfectly balanced sugar syrup.
Step 1 – Prepare the Perfect Jalebi Batter
First, combine the dry ingredients:
- All-purpose flour
- Cornstarch
- A small pinch of turmeric
Mix them well in a bowl. Then, add yogurt and gradually pour in water while whisking continuously. The goal is a smooth, lump-free batter.
The consistency should be:
- Thick but pourable
- Slightly elastic
- Similar to pancake batter, but not runny
If the batter is too thin, the spirals will spread in the oil. If it’s too thick, piping will feel almost impossible. So adjust slowly—add water one tablespoon at a time.
Finally, add baking soda and mix gently.
Step 2 – Let It Ferment (Important!)
Fermentation is what gives traditional jalebi its authentic taste and texture.
Cover the bowl and let the batter rest in a warm place for 8–12 hours. In warmer climates, 6–8 hours may be enough.
How do you know it’s ready?
- The batter will slightly rise
- Small bubbles will form
- It will smell mildly tangy
This fermentation step creates natural air pockets, which help produce crispy jalebi once fried. Skipping this stage will change the texture significantly.
If you’re short on time, we’ll discuss the instant version later—but the traditional method truly delivers the best results.
Step 3 – Make the Sugar Syrup (1-String Consistency)
While the batter finishes fermenting, prepare the syrup.
In a saucepan, combine:
- Sugar
- Water
- Crushed cardamom
Bring it to a boil, then simmer for 4–5 minutes. Add lemon juice to prevent crystallization.
The key here is reaching the one-string consistency.
To test:
- Take a small drop of syrup between your fingers.
- Gently stretch them apart.
- If a thin string forms without breaking immediately, it’s ready.
Turn off the heat and add rose water if using. Keep the syrup warm—not hot, not cold—when soaking the jalebi later.
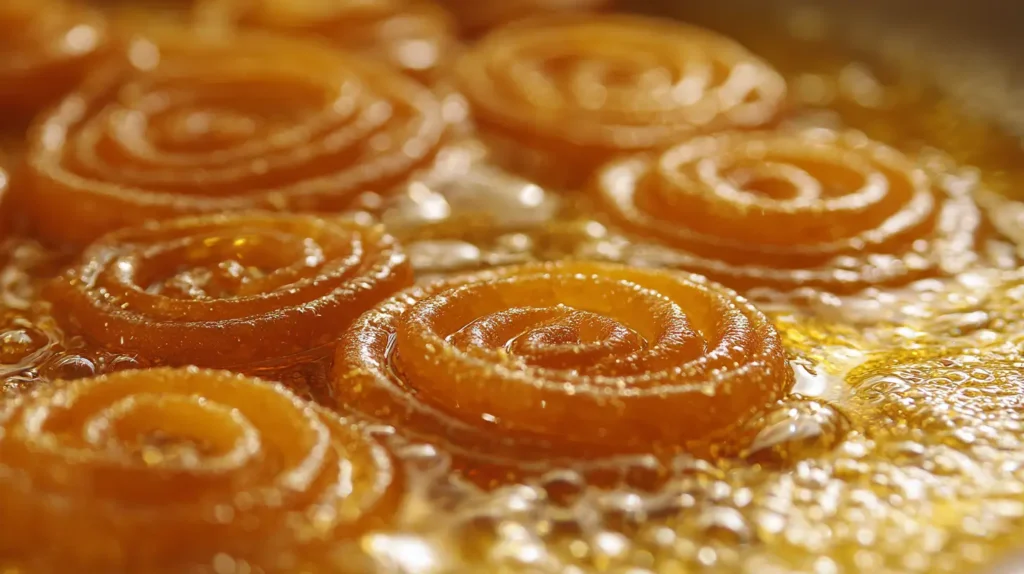
Step 4 – Pipe and Fry Jalebi
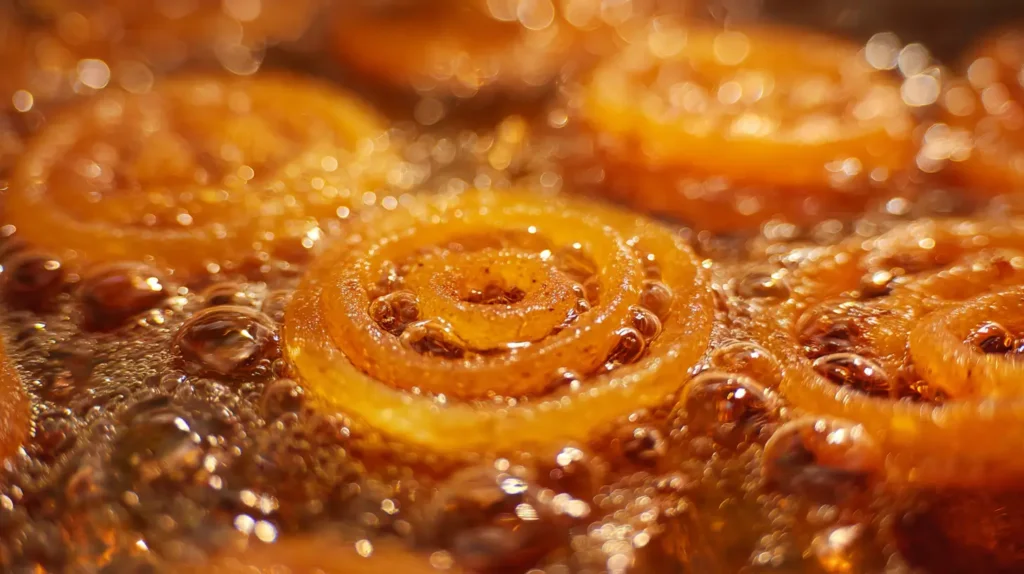
Now comes the signature spiral moment.
Heat oil (or ghee) in a wide, shallow pan over medium heat. The ideal temperature is around 350°F. If the oil is too hot, jalebi will brown too quickly. If it’s too cool, they’ll absorb excess oil and turn soggy.
Pour the batter into:
- A squeeze bottle
- A piping bag
- Or even a plastic bag with a small corner cut
Carefully pipe spiral shapes directly into the oil. Start from the center and move outward in circular motions.
Fry until:
- The jalebi turns golden and crisp
- Both sides are evenly cooked
Flip gently using tongs. Frying usually takes 2–3 minutes per side.
Step 5 – Soak in Warm Syrup
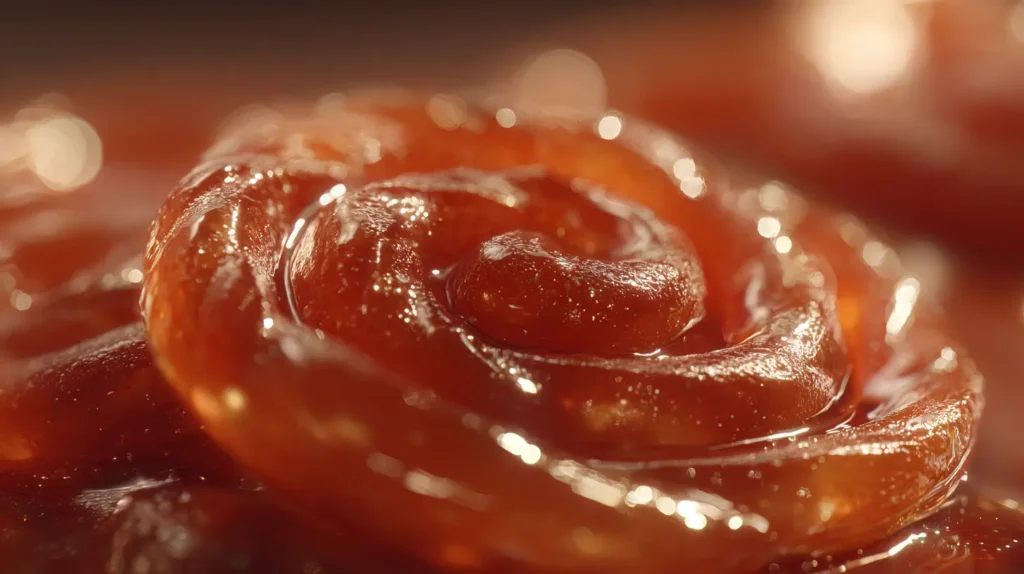
Immediately transfer the hot jalebi into warm sugar syrup.
Let them soak for about 30–60 seconds. They should absorb syrup but remain crispy.
If soaked too long, they become soft. If soaked too briefly, they won’t have enough sweetness.
Once coated, remove and place on a serving plate.
At this point, you’ve successfully mastered how to make jalebi at home using the traditional method.
Next, let’s look at expert tips to ensure your jalebi turns out perfectly crispy every single time.
Print
How to Make Jalebi at Home (Crispy, Golden & Authentic)
- Total Time: 35 minutes (plus fermentation time)
- Yield: 4 servings 1x
Description
Learn how to make jalebi at home with this authentic step-by-step recipe. These crispy golden spirals are deep-fried and soaked in fragrant cardamom sugar syrup for the perfect sweet treat.
Ingredients
- For the Batter
- 1 cup all-purpose flour
- 2 tablespoons cornstarch
- ½ cup plain yogurt
- ½ teaspoon baking soda
- Pinch of turmeric (for color)
- ½ to ¾ cup water (as needed)
- For the Sugar Syrup
- 1 cup granulated sugar
- ½ cup water
- 2–3 crushed cardamom pods
- ½ teaspoon lemon juice
- ½ teaspoon rose water (optional)
- For Frying
- Vegetable oil or ghee (for frying)
Instructions
- In a bowl, mix flour, cornstarch, and turmeric.
- Add yogurt and gradually mix in water until a smooth, thick batter forms.
- Cover and let ferment in a warm place for 8–12 hours until bubbly.
- In a saucepan, combine sugar and water. Bring to a boil.
- Add cardamom and lemon juice. Simmer until one-string consistency forms. Keep warm.
- Stir baking soda into fermented batter just before frying.
- Transfer batter to a piping bottle or zip bag with small cut tip.
- Heat oil to 340–350°F.
- Pipe spiral shapes directly into hot oil.
- Fry until golden and crisp on both sides.
- Transfer hot jalebi immediately into warm sugar syrup.
- Soak for 30–60 seconds, then remove and serve warm.
Notes
Batter should be thick but pourable. Oil temperature control is crucial for crispiness. Do not oversoak jalebi in syrup or they will soften. For instant jalebi, add ½ teaspoon Eno instead of fermenting.
- Prep Time: 15 minutes
- Cook Time: 20 minutes
- Category: Dessert
- Method: Deep Frying
- Cuisine: Indian
Nutrition
- Serving Size: 1 portion (approx. 3–4 jalebi)
- Calories: 320 kcal
- Sugar: 40 g
- Sodium: 60 mg
- Fat: 8 g
- Saturated Fat: 2 g
- Unsaturated Fat: 5 g
- Trans Fat: 0 g
- Carbohydrates: 60 g
- Fiber: 1 g
- Protein: 4 g
- Cholesterol: 5 mg
Keywords: how to make jalebi at home, homemade jalebi recipe, crispy jalebi, Indian dessert recipe, traditional jalebi
Tips for Crispy Jalebi Every Time
Even when you follow every step of how to make jalebi at home, small details can make or break the final result. Fortunately, once you understand a few key principles, getting that perfect crunch becomes much easier.
Let’s break down the expert tips that separate average jalebi from truly authentic, crispy jalebi.
Control the Oil Temperature Carefully
First things first—temperature matters more than you think.
If the oil is too hot:
- Jalebi will brown too quickly
- The inside may stay undercooked
- The texture becomes hard instead of crisp
If the oil is too cool:
- Jalebi absorbs excess oil
- They turn greasy and soggy
- The spirals may lose their shape
The ideal frying temperature is around 340–350°F. If you don’t have a thermometer, test with a small drop of batter. It should rise slowly to the surface—not sink, and not instantly darken.
Maintaining consistent heat is essential for achieving that street-style jalebi texture.
Fermentation Timing Makes a Huge Difference
Traditional fermented batter gives jalebi its light, airy bite. However, fermentation time depends on climate.
| Room Temperature | Fermentation Time |
|---|---|
| Warm (75–85°F) | 6–8 hours |
| Moderate (65–75°F) | 8–10 hours |
| Cool (Below 65°F) | 10–12 hours |
If under-fermented:
- Jalebi will taste flat
- Texture becomes dense
If over-fermented:
- Batter smells too sour
- Spirals may break in oil
The batter should look slightly bubbly and smell mildly tangy—not sharp.
Master the 1-String Sugar Syrup Stage
Syrup consistency is just as important as batter texture.
Too thick?
- Jalebi won’t absorb sweetness properly
- Sugar may crystallize
Too thin?
- Jalebi becomes soggy
- No glossy finish
The correct stage is the one-string consistency. Always keep the syrup warm when soaking the jalebi. If it cools down, gently reheat without thickening it further.
Choose the Right Frying Medium
You can use:
- Vegetable oil (neutral flavor)
- Ghee (more authentic taste)
- A mix of both
Ghee adds rich aroma and traditional flavor. However, vegetable oil works perfectly for home cooking and keeps the dessert lighter.
Don’t Over-Soak the Jalebi
Timing is everything here.
Hot jalebi should go into warm syrup for 30 to 60 seconds only. After that, remove them immediately.
Leaving them too long results in:
- Soft texture
- Loss of crispiness
Short soaking keeps the outside crisp while allowing syrup to penetrate just enough.
Quick Troubleshooting Guide
| Problem | Likely Cause | Solution |
|---|---|---|
| Jalebi not crispy | Oil too cool | Increase heat slightly |
| Too sour taste | Over-fermentation | Reduce resting time |
| Soggy texture | Syrup too thin | Cook syrup longer |
| Hard texture | Oil too hot | Lower temperature |
Mastering these small details will dramatically improve your results. And once you get comfortable with the traditional method of how to make jalebi at home, you can experiment with quicker alternatives.
Up next, let’s compare instant jalebi vs traditional fermented jalebi to help you decide which method suits you best.
Instant Jalebi vs Traditional Fermented Jalebi
If you’re learning how to make jalebi at home, you’ll quickly discover two popular methods: the traditional fermented version and the instant jalebi method. While both produce golden spirals soaked in syrup, the taste and texture are slightly different.
So which one should you choose? Let’s break it down clearly.
Traditional Fermented Jalebi
This is the authentic method used across India for generations.
How it works:
The batter ferments naturally using yogurt over several hours. This creates mild tanginess and airy structure before frying.
Pros:
- Authentic flavor
- Better crispiness
- Slight tangy taste
- Street-style texture
Cons:
- Requires 8–12 hours of fermentation
- Needs planning ahead
Traditional jalebi delivers the best balance of crisp outside and juicy inside. If you want the real deal, this is the method to follow when mastering how to make jalebi at home.
Instant Jalebi (Eno or Baking Soda Method)
Short on time? Instant jalebi skips long fermentation.
Instead of waiting overnight, you add:
- Eno fruit salt (or extra baking soda)
- A small amount of citric acid (optional)
This creates quick aeration, allowing you to fry the batter within 20–30 minutes.
Pros:
- Ready quickly
- Great for last-minute cravings
- Easier for beginners
Cons:
- Slightly less tangy
- Texture may be less airy
- Crispiness may not last as long
Instant jalebi works well if you’re in a hurry, but the flavor depth isn’t quite the same as fermented batter.
Side-by-Side Comparison
| Feature | Traditional Jalebi | Instant Jalebi |
|---|---|---|
| Fermentation Time | 8–12 hours | 20–30 minutes |
| Flavor | Slightly tangy | Mildly sweet |
| Texture | Very crispy & airy | Crispy but slightly denser |
| Authenticity | Highly authentic | Modern shortcut |
| Best For | Festivals & special occasions | Quick dessert fix |
Which Method Should You Choose?
If time isn’t an issue, go with the traditional fermented jalebi. The flavor complexity and crispiness are worth the wait.
However, if you’re just experimenting with how to make jalebi at home for the first time, the instant method can build your confidence before moving on to the classic version.
Either way, controlling oil temperature and syrup consistency still matters most.
Common Mistakes to Avoid When Making Jalebi at Home
Even when you follow every step of how to make jalebi at home, small errors can ruin the texture or flavor. Fortunately, most problems come from just a few common mistakes. Once you know what to watch for, fixing them becomes easy.
Let’s go through them one by one.
Batter Too Thin or Too Thick
Consistency is everything.
If the batter is too thin:
- Spirals will spread in oil
- Jalebi won’t hold shape
- Texture becomes flat and oily
If the batter is too thick:
- Hard to pipe
- Uneven spirals
- Dense, doughy interior
The correct batter should flow smoothly but not drip like water. When poured, it should form ribbons that sit on the surface of the oil before slowly spreading.
Fix: Add water gradually, one tablespoon at a time. If it becomes too thin, mix in a small amount of flour to rebalance.
Sugar Syrup Too Thick or Too Watery
The syrup (chashni) determines whether your jalebi turns glossy and juicy—or soggy and heavy.
If syrup is too thick:
- Jalebi won’t absorb it properly
- Sugar may crystallize
- Texture becomes sticky instead of juicy
If syrup is too thin:
- Jalebi becomes soft
- No crisp bite remains
Always aim for the one-string consistency. Also, remember this key rule: hot jalebi goes into warm syrup.
Temperature balance makes a huge difference.
Oil Too Hot or Too Cool
Temperature control is one of the most overlooked parts of how to make jalebi at home.
If oil is too hot:
- Jalebi turns dark brown too quickly
- Inside stays undercooked
- Texture becomes hard
If oil is too cool:
- Jalebi absorbs oil
- Result becomes greasy
- Spirals lose crispness
Keep the heat at medium. If you see rapid bubbling and dark color immediately, reduce the flame slightly.
Over-Soaking or Under-Soaking
Soaking time affects final texture more than most people realize.
| Soaking Time | Result |
|---|---|
| Under 20 sec | Not sweet enough |
| 30–60 sec | Perfect balance |
| Over 1 minute | Soft and soggy |
Always remove jalebi from syrup once coated. Don’t leave them sitting.
Skipping Fermentation Too Soon
If using the traditional method, cutting fermentation short leads to:
- Flat taste
- Dense texture
- Less crisp structure
On the other hand, over-fermentation causes overly sour flavor and weak batter structure.
Timing truly matters.
Not Practicing the Spiral Technique
Many beginners struggle with piping. However, perfect spirals come with practice.
Tip:
- Start from the center
- Move outward in circular motion
- Keep steady pressure
Even if the shapes aren’t perfect, the taste will still be delicious. So don’t stress over aesthetics too much.
By avoiding these mistakes, your homemade jalebi will turn out crispy, golden, and syrupy every time.
Delicious Jalebi Variations to Try
Once you’ve mastered how to make jalebi at home, it’s time to have a little fun. While the classic version is always a winner, there are several popular variations that add new flavors and textures to this traditional Indian sweet.
Whether you want something quicker, richer, or more festive, these options are worth trying.
Instant Jalebi (Quick Version)
If you’re short on time, the instant method is your best friend.
Instead of fermenting overnight, you add:
- Eno fruit salt
- Or a little extra baking soda
This creates quick aeration in the batter, allowing you to fry jalebi almost immediately.
Although the flavor isn’t as tangy as the fermented version, instant jalebi still delivers crispiness and sweetness. It’s perfect for last-minute gatherings or sudden dessert cravings.
Best for:
- Weeknight treats
- Beginner cooks
- Quick festival preparation
Kesar Jalebi (Saffron Infused)
Kesar jalebi takes the traditional recipe up a notch by infusing saffron into the sugar syrup.
To make it:
- Soak a few saffron strands in warm milk
- Add the infusion to the syrup
The result?
- A deeper golden color
- Floral aroma
- Slightly richer taste
Kesar jalebi is often served during weddings and religious festivals. It looks elegant and tastes luxurious.
Rabri Jalebi (Festival Style)
Rabri jalebi is pure indulgence.
In this variation, crispy jalebi is served with thickened sweet milk called rabri poured over the top. The combination of warm jalebi and chilled rabri creates an incredible contrast.
Texture contrast:
- Crispy spirals
- Creamy topping
- Sticky syrup base
If you’re exploring advanced ways of how to make jalebi at home for special occasions, this version always impresses guests.
Mini Jalebi Bites
Want something bite-sized?
Simply pipe smaller spirals into the oil. These mini jalebi pieces are perfect for:
- Party platters
- Dessert buffets
- Kids’ servings
They cook faster and soak syrup more evenly, making them extra juicy.
Flavor Experiment Ideas
Once you feel confident, try adding:
- Orange zest to the syrup
- A hint of rose essence
- Crushed pistachios for garnish
- A splash of kewra water
These small tweaks elevate the flavor without changing the core recipe.
At this point, you now understand the base method and several variations. But before we wrap up, let’s answer some of the most frequently asked questions about how to make jalebi at home to clear up any remaining doubts.
FAQs About How to Make Jalebi at Home
When learning how to make jalebi at home, a few common questions always come up. Below are clear, practical answers to help you troubleshoot and perfect your recipe.
Why is my jalebi not crispy?
If your jalebi isn’t crispy, one of three things usually went wrong:
Oil temperature was too low
Sugar syrup was too thin
Batter was under-fermented
First, make sure the oil is around 340–350°F. Next, check that your syrup has reached one-string consistency. Finally, confirm that your batter rested long enough to develop air bubbles.
Crispy jalebi depends on proper frying and correct syrup thickness working together.
Can I make jalebi without fermentation?
Yes, you can.
The instant method uses Eno fruit salt or extra baking soda to aerate the batter quickly. This allows you to skip the 8–12 hour fermentation.
However, keep in mind:
Flavor will be milder
Texture may be slightly denser
Crispiness might not last as long
If authenticity matters, fermentation is worth the wait. But if you’re short on time, instant jalebi still works well.
What oil is best for frying jalebi?
You have three good options:
Vegetable oil (neutral and practical)
Ghee (traditional and aromatic)
A mix of both
Vegetable oil is most commonly used at home because it’s affordable and stable at frying temperatures. Ghee adds a richer, more authentic flavor.
Choose based on preference and availability.
How long does jalebi stay fresh?
Jalebi tastes best when served fresh.
At room temperature:
Best within 8–10 hours
Still good up to 24 hours
After that, crispiness fades.
To reheat:
Warm in oven at low temperature for a few minutes
Avoid microwaving, as it softens the texture
For maximum crunch, always serve the same day.
Can jalebi be baked instead of fried?
Technically, yes—but the texture changes significantly.
Baked jalebi:
Will not be as crispy
Lacks traditional deep-fried crunch
Has a slightly drier bite
Since jalebi is known as a deep-fried spiral sweet, frying delivers the authentic result. Baking works only as a lighter alternative, not a true substitute.
Now that all your questions about how to make jalebi at home are answered, let’s finish with serving ideas, storage tips, and final expert advice to help you nail this classic Indian dessert every single time.
Serving, Storage & Final Thoughts
Now that you fully understand how to make jalebi at home, let’s talk about how to serve it properly, store leftovers, and elevate the final presentation. Because honestly, presentation and timing make a big difference with this crispy Indian sweet.
How to Serve Jalebi (Festive & Everyday Ideas)
Jalebi is incredibly versatile. Although it’s traditionally served warm, there are several delicious ways to enjoy it.
Classic Serving Style
- Serve hot, straight after soaking in syrup
- Garnish with chopped pistachios or almonds
- Pair with warm milk or masala chai
Festival Style
- Serve with chilled rabri (thickened sweet milk)
- Sprinkle saffron strands for visual appeal
- Plate on a silver or decorative dish
Modern Twist
- Use mini jalebi as ice cream topping
- Add to dessert boards
- Drizzle with condensed milk for extra richness
If you enjoy festive desserts, you may also like this Mardi Gras king cake guide.
And for another syrup-based dessert idea, check out our cinnamon roll cheesecake.
Both desserts offer that same indulgent, sweet finish that makes jalebi so satisfying.
How to Store Jalebi Properly
While jalebi is best eaten fresh, you can store it carefully.
At Room Temperature
- Store in airtight container
- Keep for up to 24 hours
In Refrigerator
- Store up to 3 days
- Reheat lightly before serving
To reheat properly:
- Use oven at low temperature (300°F) for 5–7 minutes
- Avoid microwave, as it softens the crisp layer
Keep in mind: crispiness naturally fades over time. So for best results, plan to serve jalebi the same day.
Final Expert Tips for Perfect Homemade Jalebi
Before we wrap up, here are the most important reminders:
- Always aim for one-string syrup consistency
- Fry at steady medium heat
- Do not oversoak in syrup
- Adjust batter slowly, not all at once
- Practice spiral piping—it gets easier every time
Making jalebi at home may feel intimidating at first. However, once you understand batter texture, oil temperature, and syrup timing, everything clicks into place.
And that’s it—you now know exactly how to make jalebi at home, from traditional fermented batter to instant variations. With a little patience and attention to detail, you can recreate that crispy, golden, syrup-soaked perfection anytime you want.