
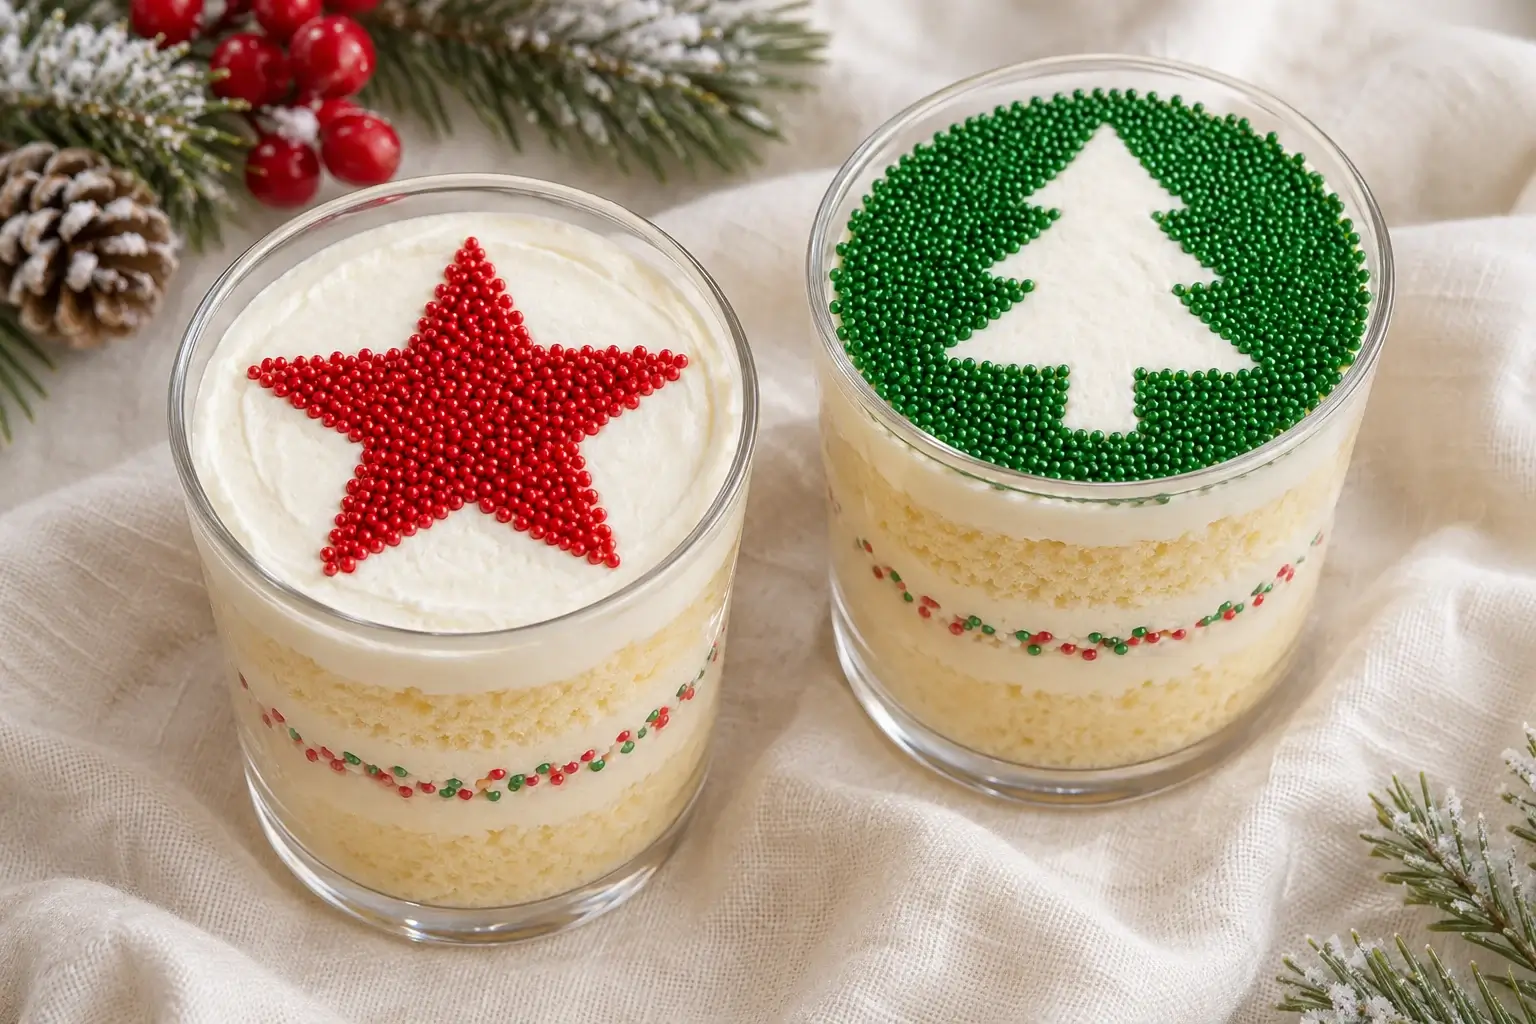
Christmas dot cakes layer hot milk sponge and silky condensed milk buttercream in clear cups. A thin ring of red and green nonpareils shows through the sides, and a small cookie cutter makes a star or tree on top. One shallow sponge makes four large verrines to share or about eight mini Christmas cake cups. Reserve the neat cake circles for the upper layer and use the trimmings underneath, where every spoonful still picks up cake and frosting.
What are Christmas dot cakes?
Holiday dot cakes are individual sprinkle cakes decorated for a celebration. This Christmas version has two decorations you can see from different angles: a narrow ring of color through the glass and a stencil on the flat frosting. A red star on white buttercream gives a crisp shape, while a white tree in a field of green sprinkles makes a good reverse stencil. The condensed milk in Russian buttercream gives it a smooth, rich finish and the sponge is light enough for two layers in a small cup.
The original viral dot cake recipe uses cream cheese frosting and a rainbow dip. For a holiday dessert board, make a few glasses with stencils and serve them alongside Grinch Oreo truffles or a platter from these Christmas cookie recipes.
Christmas Dot Cakes
- Total Time: 1 hour 50 minutes
- Yield: 4 large cups (about 8 mini cups) 1x
Description
Festive hot milk sponge cups with Russian buttercream, a visible ring of Christmas nonpareils and star or tree sprinkle stencils.
Ingredients
Hot milk sponge cake
- 140 g all-purpose flour
- 1 teaspoon baking powder
- 1 pinch fine salt
- 3/4 cup superfine sugar (160 g)
- 2 large eggs
- 1/2 teaspoon vanilla extract
- 1/2 cup whole milk (120–125 mL)
- 60 g unsalted butter (about 4 1/4 US tablespoons)
Russian buttercream and decoration
- 250 g unsalted butter, softened
- 1 can sweetened condensed milk (14 ounces or 395 g), at room temperature
- 1/3 cup red, green, gold or white nonpareils, plus more as needed for the stencils
Instructions
- Heat a fan oven to about 355°F (180°C), as in the source recipe. For a conventional oven, start at 375°F (190°C) and use the doneness cues below. Grease the shallow pan and line it with parchment that extends above the long edges. Whisk the flour, baking powder and salt together.
- Beat the eggs, sugar and vanilla for several minutes until pale, thick and foamy. Stir in the dry mixture just until incorporated. Heat the milk and butter until the butter melts and the milk starts to simmer. Pour the hot mixture into the batter and mix until even. Transfer promptly to the pan.
- Bake 15–20 minutes, until the center is set and springs back with a gentle touch. Cool completely on a rack before you lift and cut the sponge. A warm cake can tear and melt the buttercream.
- Beat the softened butter until pale and airy. Pour in the room-temperature condensed milk in several additions, beating between each one until the frosting looks smooth. Use a thin layer between the cakes and save enough to cover each top. Refrigerate leftover frosting separately.
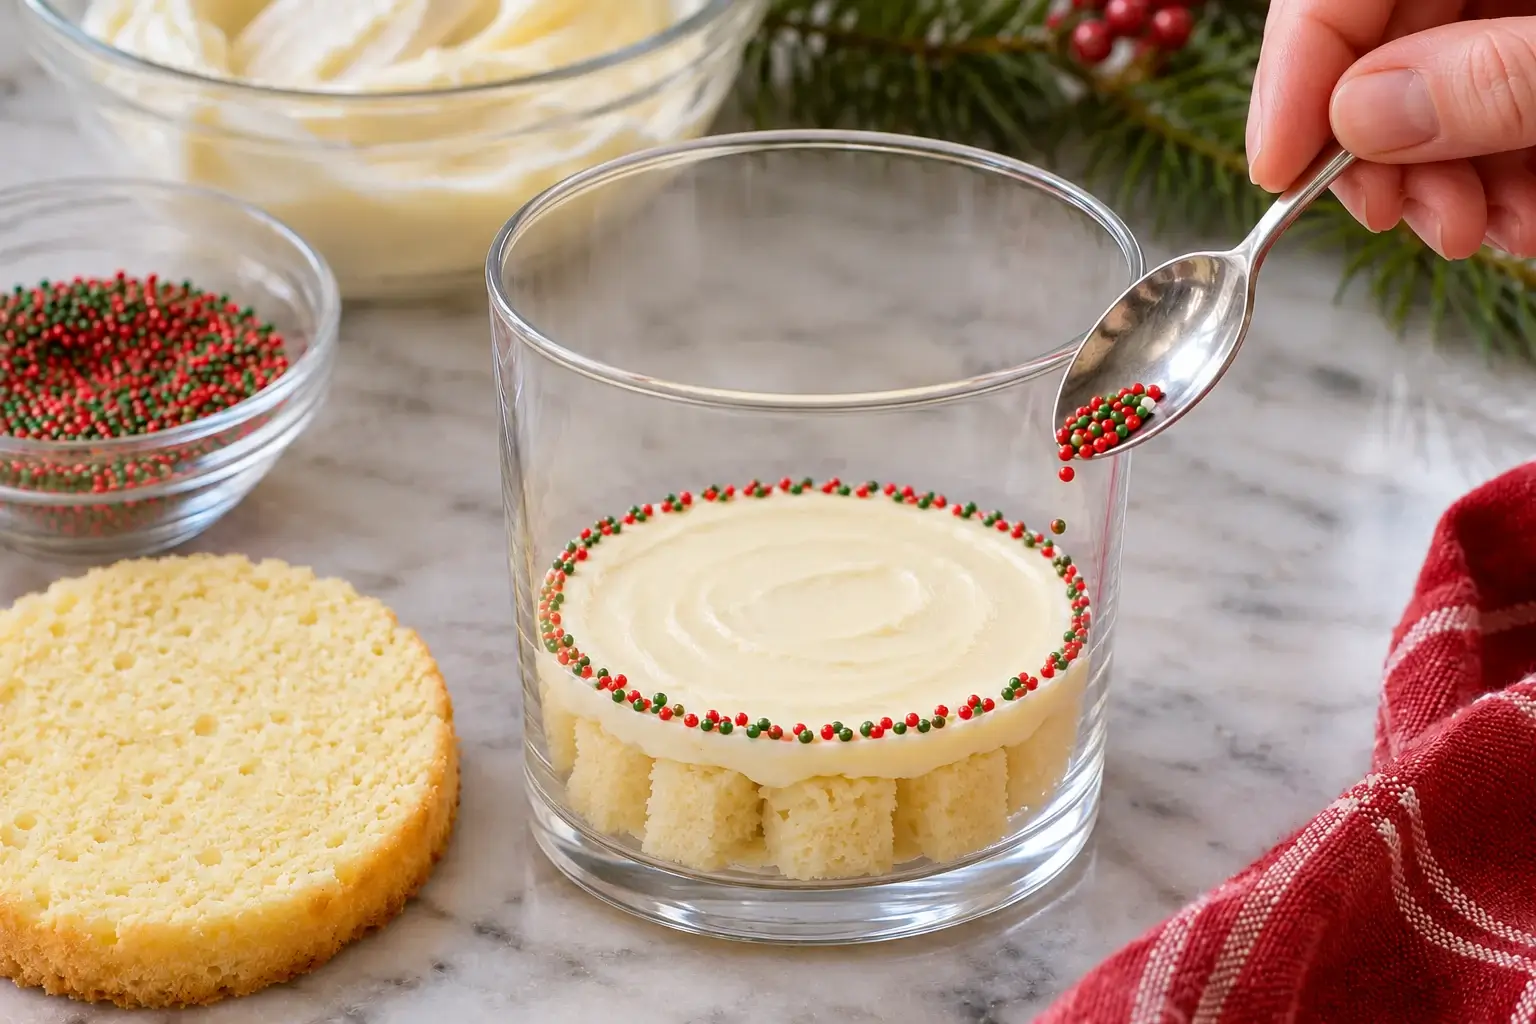
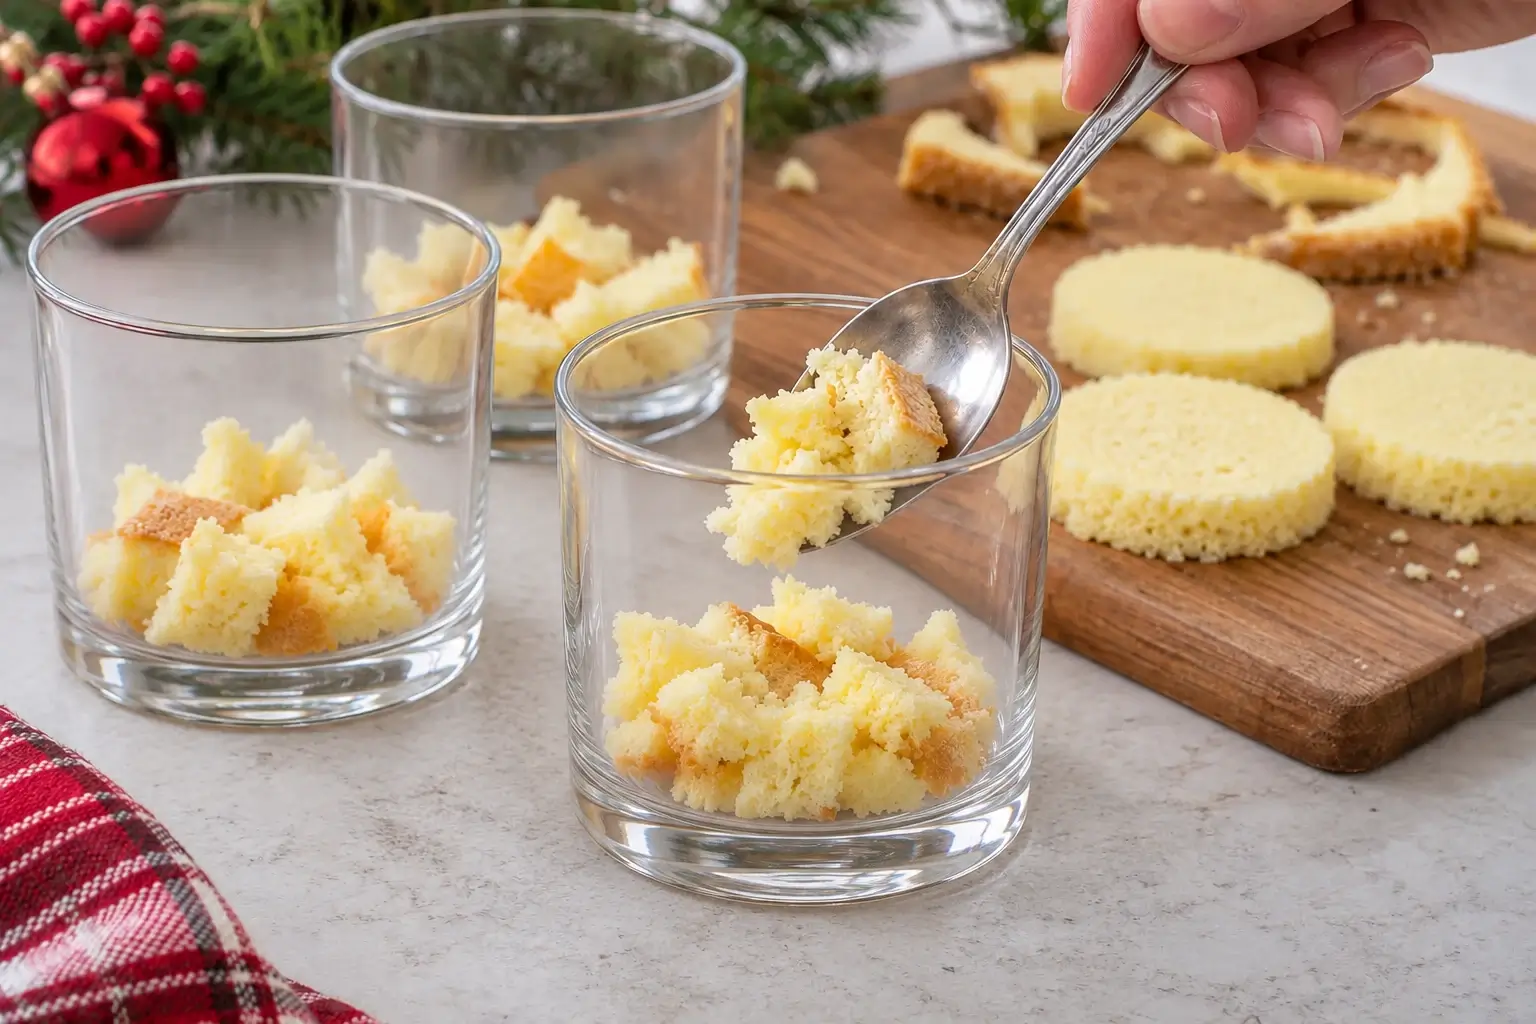
- Measure across the inside of a cup where the upper sponge will sit. Cut one full round per cup. Cut the remaining cake into cubes and divide it among the cups for the base. Nestle the cubes together lightly so a spoon can pick up an even bite.
- Pipe a thin layer of buttercream over the cubes. Sprinkle a narrow ring of nonpareils against the inside of the glass so it shows through the side. Add a cake round, cover with buttercream and smooth the top. Leave a little clearance below the rim if you are using lids.
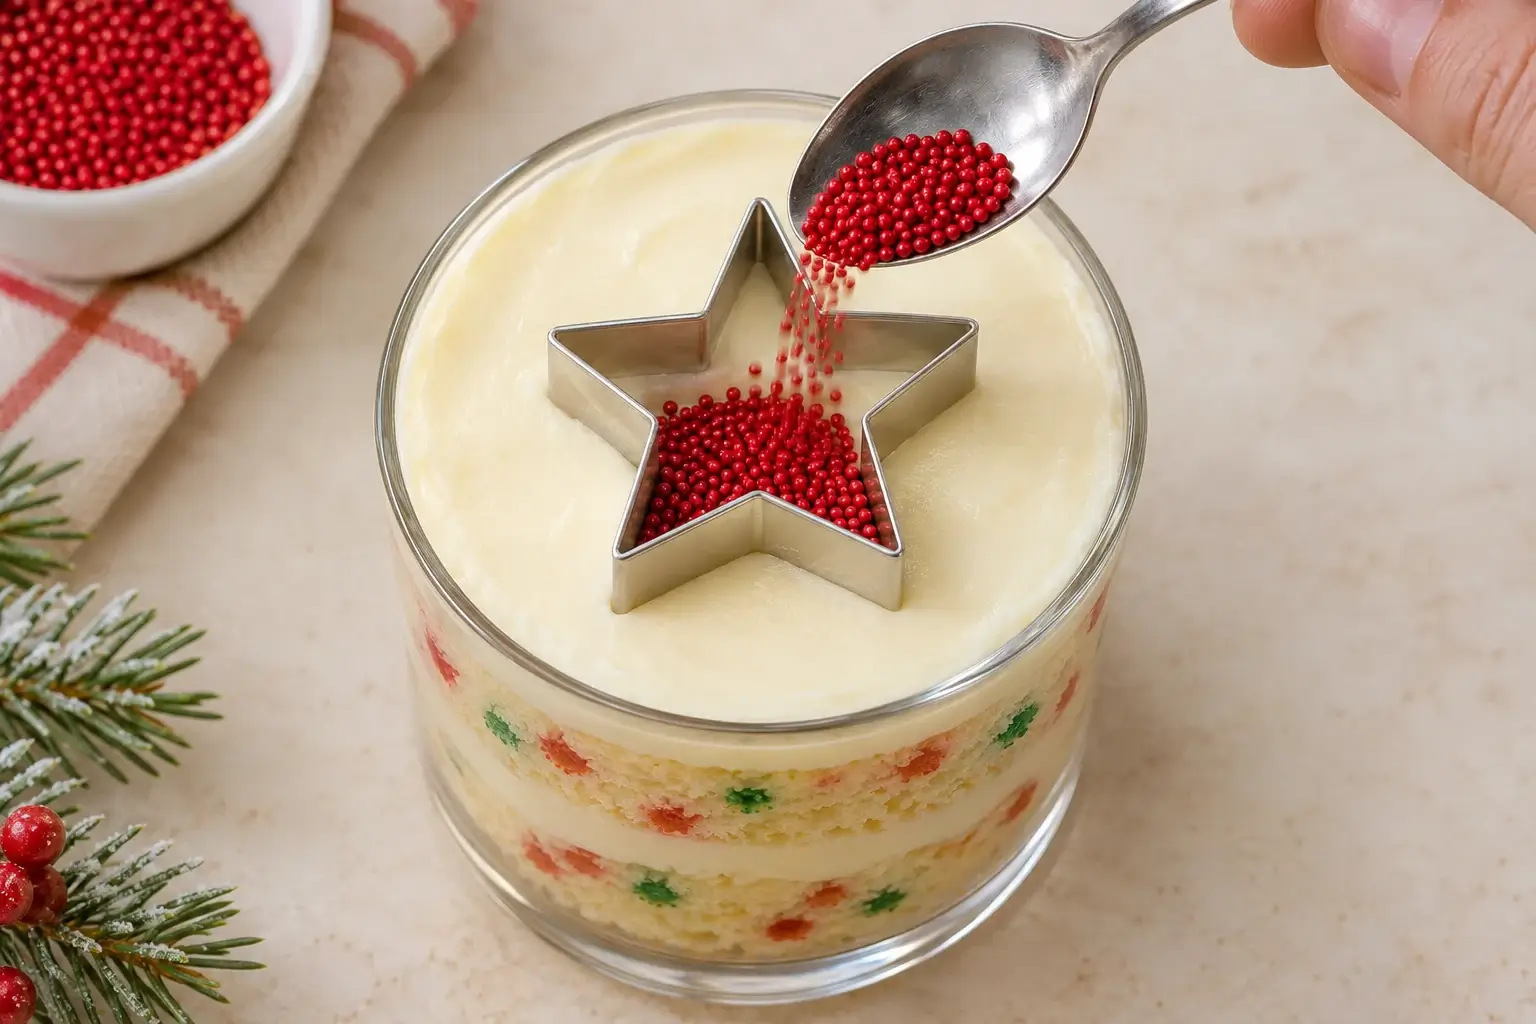
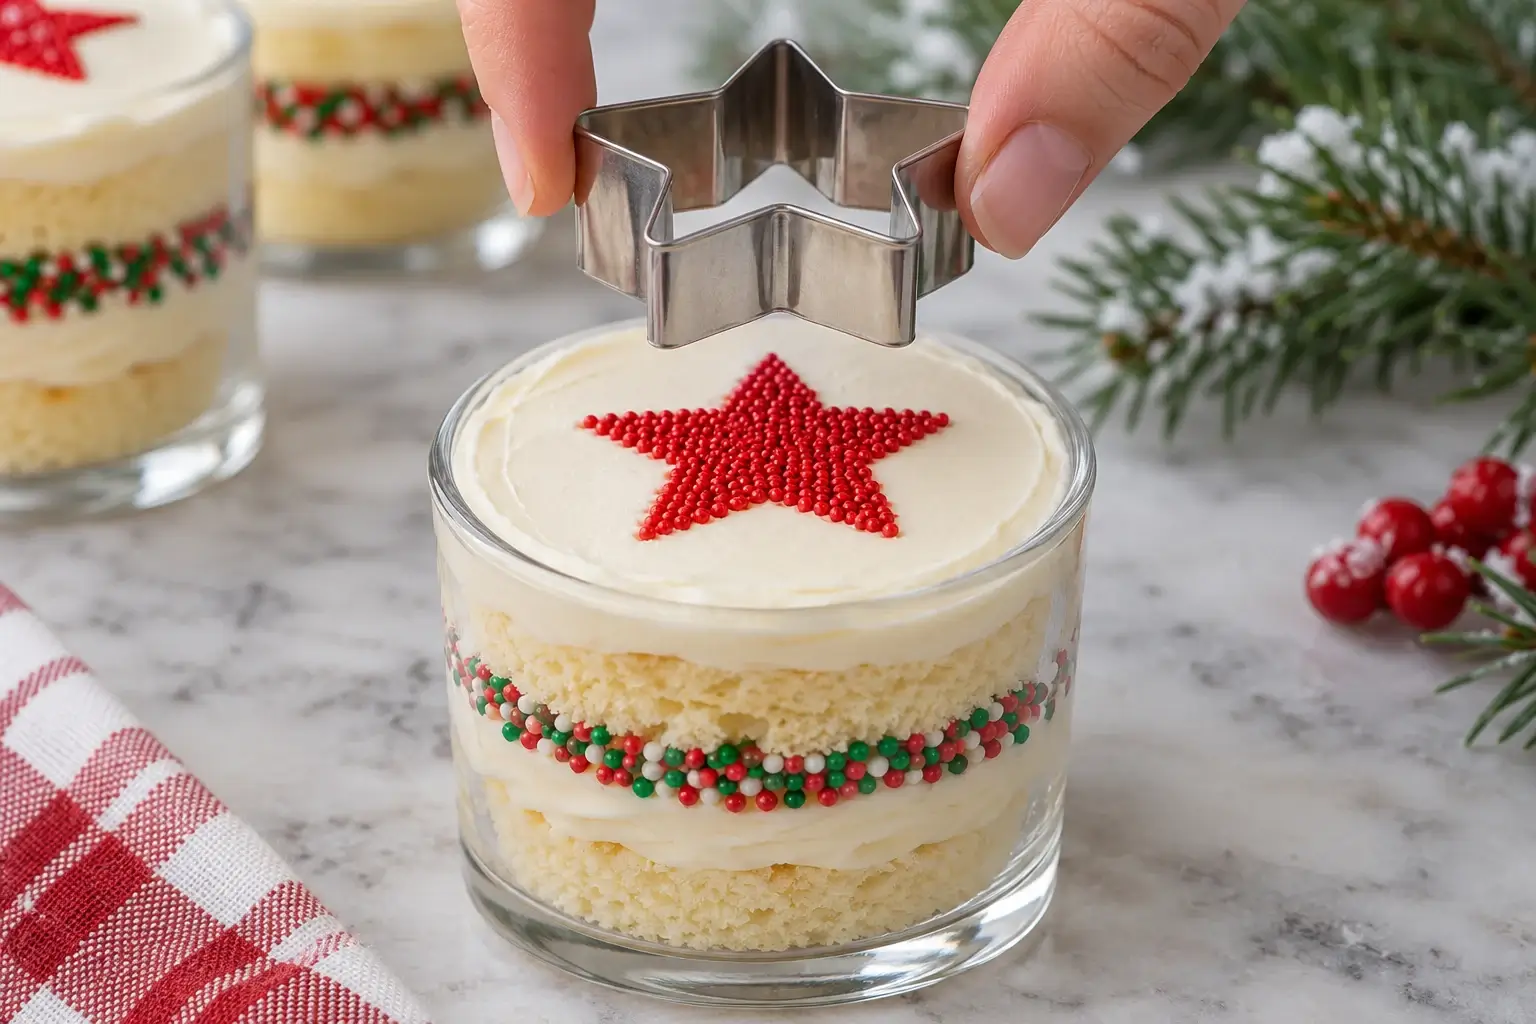
- For a filled star or tree, rest a clean, dry cookie cutter lightly on the frosting, sprinkle inside it and lift it vertically. For a reverse stencil, sprinkle around the cutter and lift it to reveal the plain buttercream shape. Decorate near serving time.
Notes
The large cups hold about 310 mL each and can be shared. For a dessert buffet, use 4–5-fl-oz cups and size the rounds to fit. Bring the butter and condensed milk to the same temperature before whipping. Refrigerate the frosted cups, then add the stencil near serving time.
- Prep Time: 30 minutes
- Cooling Time: 1 hour
- Cook Time: 20 minutes
- Category: Dessert
- Method: Baking
- Cuisine: American
Keywords: Christmas dot cakes, holiday dot cakes, mini Christmas cake cups
The sponge, condensed milk buttercream and glass-side ring are adapted from Cooking with Nana Ling’s Christmas dot cake. The grams for flour and butter are useful here because Australian and US volume measures can differ. Use regular sweetened condensed milk for the frosting. Evaporated milk has a different consistency and would make the buttercream much looser.
How to make neat Christmas tree and star decorations
Work with frosting that holds a shallow impression and still feels slightly tacky. Level it with a small spatula, chill it briefly if the surface is very soft, then blot the cutter dry. Keep the cutter about ½ inch from the rim and press only enough to keep the dots from rolling under the edge. Spoon in a thin layer of nonpareils, aiming at the narrow tips first. Lift without twisting. If a point looks empty, place a few dots there with the tip of a dry spoon.
For the reverse version, use one contrasting color around the stencil. Tilt the cup only after the frosting has gripped the sprinkles. A lid with headroom preserves the pattern for travel. For a platter that matches without looking identical, alternate filled red stars, white trees surrounded by green dots and a few fully coated cups. Gold-colored nonpareils should be sold as edible decorations.
Zero-waste holiday cake cup assembly
For straight-sided cups, cut the rounds close together. For a flared glass, measure lower than the rim so the cake sits inside instead of getting stuck at the opening. If you run short of circles, join two semicircles and put the seam underneath the top layer of frosting. Cubes or semicircles also work as the lower layer for smaller glasses. If some scraps remain after assembly, save them for a single extra tasting cup or freeze the plain sponge separately.
The larger hot milk sponge variation in the source research makes about 10 cups. It uses 300 g cake flour, 2 teaspoons baking powder, 385 g superfine sugar, 4 eggs, 310 mL whole milk and 113 g butter, plus salt and vanilla. That version is baked in a larger pan and has its own mixing order and timing. For the full version and syrup quantities, follow Not Quite Nigella’s hot milk sponge dot cakes. For a filled holiday cup, spread a teaspoon of jam or pistachio or chocolate-hazelnut spread in the center of a cake layer, keeping it away from the edges. Pistachio and hazelnut spreads introduce tree nuts, so label those cups clearly.
Make-ahead and storage tips
Bake the sponge a day ahead and wrap it once cool. Frost the cups, cover and refrigerate at 40°F (4°C) or colder. For the cleanest color, wait until serving day to add the middle ring and stencil. If you have already assembled the full cups, keep the middle ring narrow and plan for a little color migration overnight. A useful compromise is to assemble the base and first layer of frosting a day ahead, then add the ring, upper round and top on the day.
Use the refrigerated cups within 3 days. For longer planning, freeze the undecorated sponge separately, then thaw it wrapped in the refrigerator. Take the frosted cups out about 20–30 minutes before serving so the buttercream can soften. Keep the time that perishables spend out of refrigeration within 2 hours total, or 1 hour above 90°F (32°C). For larger groups, follow the same stencil approach on party-sized dot cake cups and finish them in batches. USDA storage guidance.
FAQS
Why did my Russian buttercream split?
The butter and condensed milk may have been at different temperatures. If the bowl looks cold and curdled, warm its outside briefly and whip again. If the mixture looks slack or oily, chill it briefly, then beat it until smooth. Add condensed milk gradually on your next batch.
Can I make Christmas dot cakes with boxed cake mix?
Yes. Bake a vanilla cake according to the box, cool it fully and use the same assembly. A shallow, even layer makes it easier to cut two modest layers for small cups.
Can I make holiday dot cakes without cookie cutters?
Yes. Put one color down the middle and a second around the edge, or cover the entire top in a red, green and white mix. For a flat pattern, use a small paper template held just above the frosting while you sprinkle.
What cup size works best for a dessert buffet?
Start with 4–5-fl-oz cups if other desserts are served. The larger 310 mL verrines are better for sharing and show the layers more clearly.
Why did the star lose its shape?
Frosting that is too warm can slump, and a very heavy layer of sprinkles can roll when the cutter lifts. Chill the surface briefly, use smaller nonpareils and lift the cutter straight up.