
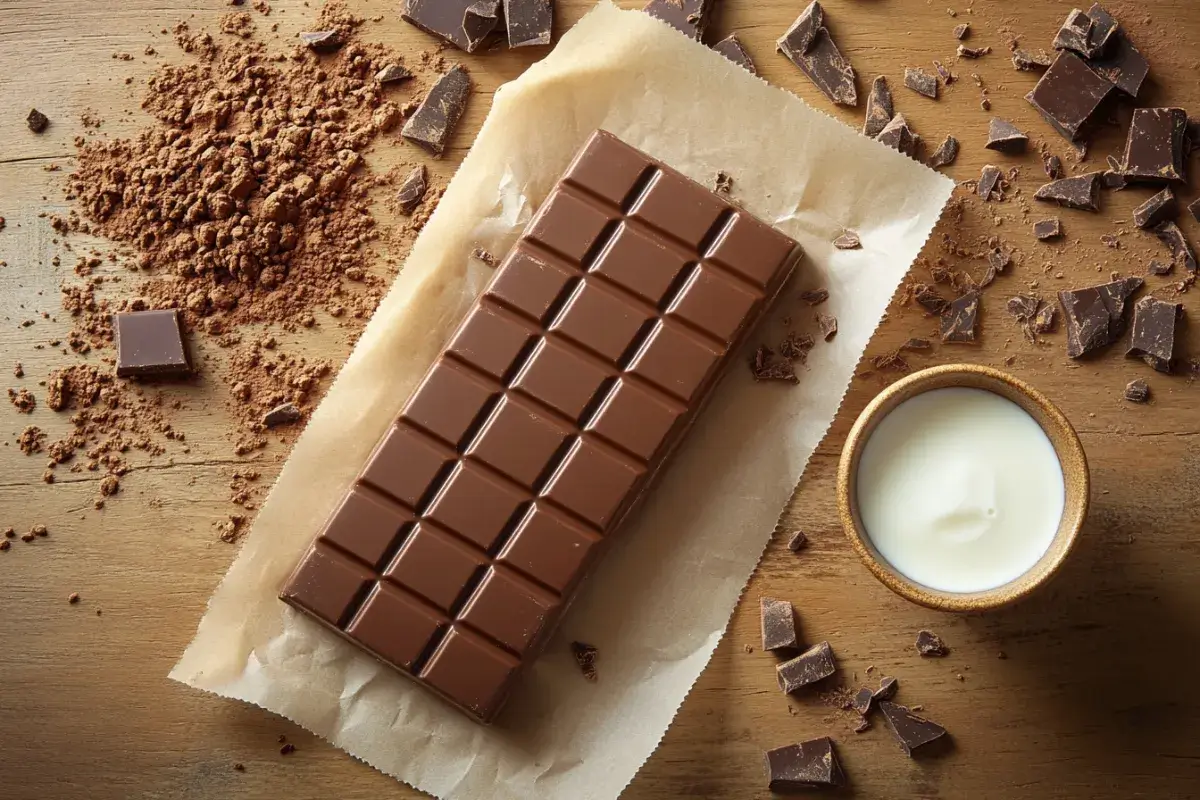
Milk chocolate is smooth, creamy, and perfectly sweet — and you can make it at home with just a few simple ingredients. In this guide, you’ll learn how to make milk chocolate using cocoa powder, milk powder, and pantry staples. This easy milk chocolate recipe includes exact measurements, tips to prevent grainy texture, dairy-free options, and even how to turn dark chocolate into milk chocolate.
Why Make Homemade Milk Chocolate?
Making milk chocolate at home might sound intimidating at first, but it’s far simpler than you think—and the rewards are absolutely worth it. First and foremost, homemade milk chocolate gives you the opportunity to control exactly what goes into your treat. Unlike store-bought options, which often include preservatives, artificial flavors, and excess sugar, homemade versions can be as pure and healthy as you want them to be.
Another great advantage is the ability to customize. Do you prefer a darker chocolate taste? You can add less milk powder and more cocoa powder. Want a vegan milk chocolate option? Use coconut milk powder and a natural sweetener like stevia or erythritol. By making your own chocolate, you can experiment endlessly and tailor the recipe to your dietary preferences.
Moreover, homemade milk chocolate is an incredibly versatile ingredient. It can be used in baking, melted for drizzling over desserts, or even shaped into beautiful molds for gift-giving. Imagine surprising your loved ones with personalized chocolate bars or unique creations filled with nuts, dried fruits, or spices. This is more than just chocolate—it’s a creative, edible masterpiece.
In addition to these benefits, making chocolate is a fun and therapeutic activity. There’s something deeply satisfying about seeing a glossy, smooth chocolate bar emerge from just a handful of ingredients. Whether you’re a seasoned chef or a beginner in the kitchen, crafting homemade milk chocolate is a joyful experience that brings out your inner chocolatier.
If you’re interested in mastering chocolate from scratch, check out our step-by-step guide on how to make homemade chocolate.
Ingredients for Milk Chocolate (Exact Measurements)
To make milk chocolate, you only need a few key ingredients and some basic tools that you likely already have in your kitchen. Let’s take a closer look at what you’ll need.

Essential Ingredients
- Cocoa Butter: The cornerstone of any milk chocolate recipe, cocoa butter provides the smooth and creamy texture that makes chocolate so irresistible. Always opt for food-grade cocoa butter for the best results.
- Cocoa Powder: This is what gives your chocolate its rich, chocolatey flavor. Unsweetened cocoa powder works perfectly, but if you prefer a more natural option, try using raw cacao powder.
- Milk Powder: This ingredient gives milk chocolate its signature creamy taste. For a vegan or dairy-free version, substitute coconut milk powder or oat milk powder.
- Powdered Sweetener: Powdered sugar is the traditional choice, but you can use alternatives like erythritol, monk fruit, or stevia for a sugar-free version. Ensure it’s finely powdered to avoid grittiness.
Optional add-ins include a pinch of sea salt, a splash of vanilla extract, or even a dash of cinnamon for extra depth of flavor.
Can I Make Milk Chocolate With Cocoa Powder?
Yes, you can make milk chocolate using cocoa powder instead of chocolate bars. Simply combine cocoa powder with melted cocoa butter, milk powder, and powdered sugar. The key is to sift the cocoa powder and use enough fat (cocoa butter) to prevent a grainy texture.
Tools Needed
- Double Boiler: A must-have for gently melting cocoa butter without burning it.
- Silicone Chocolate Molds: Perfect for shaping your chocolate into professional-looking bars or fun designs.
- Candy Thermometer: Helps you achieve precise temperatures during the tempering process for a glossy finish and satisfying snap.
- Silicone Spatula: Ideal for mixing and scraping every last bit of chocolate from the bowl.
Additional tools that can enhance the process include a food processor, immersion blender, or melanger to ensure your chocolate is silky smooth.
UK and Metric Measurements
If you prefer to use UK or US measurements instead of grams, use the conversions below for accurate results.
| Ingredient | Metric (grams) | UK / US (cups & tbsp) |
|---|---|---|
| Cocoa Butter | 100 g | ½ cup |
| Cocoa Powder | 30 g | ¼ cup |
| Milk Powder | 50 g | ½ cup |
| Powdered Sugar | 50 g | ¼ cup |
How to Make Milk Chocolate Step-by-Step
Follow these simple steps to make smooth, creamy milk chocolate at home.
Step 1: Preparing Your Ingredients
Measure all ingredients precisely:
- 100g of cocoa butter
- 50g of milk powder
- 30g of cocoa powder
- 50g of powdered sweetener
Sift the cocoa powder and milk powder to prevent lumps.
Step 2: Melt the Cocoa Butter
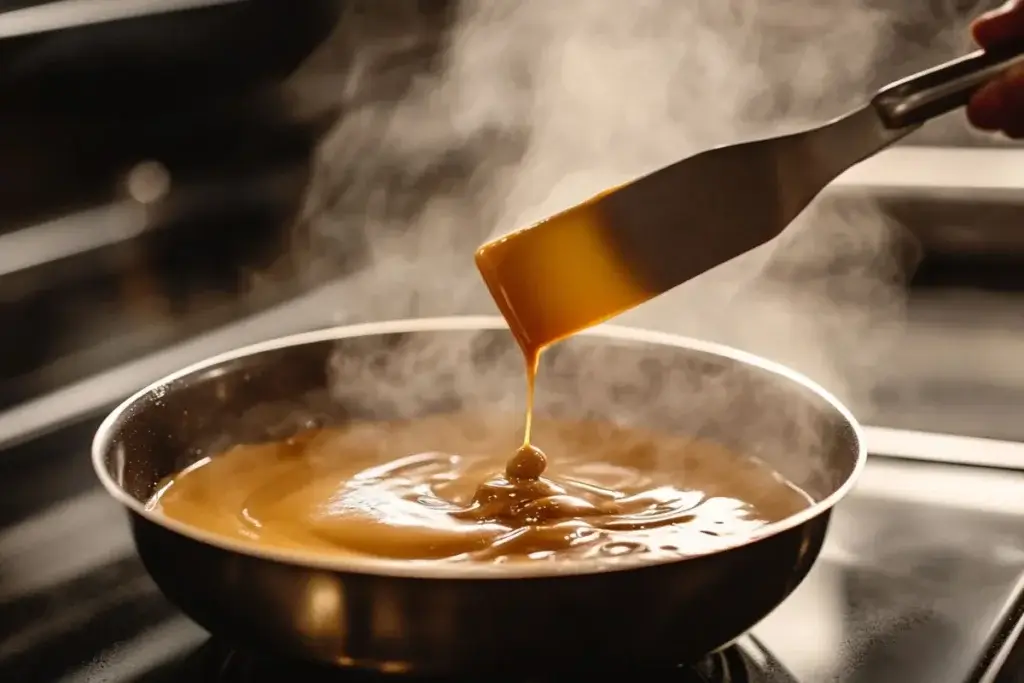
Place the cocoa butter in a heatproof bowl over a double boiler.
Heat gently until fully melted (about 5 minutes).
Do not let water touch the bowl.
Step 3: Add Cocoa Powder and Milk Powder

Remove from heat.
Slowly add cocoa powder while stirring continuously.
Then add milk powder and powdered sugar.
Mix until fully combined and smooth.
Step 4: Blend for a Smooth Texture (Optional but Recommended)
For extra creaminess, use an immersion blender or food processor to eliminate graininess.
Step 5: Temper the Chocolate (Optional)
For a glossy finish and firm snap:
- Heat to 45°C (113°F)
- Cool to 28°C (82°F)
- Reheat to 32°C (90°F)
Skip this step if you prefer a softer homemade texture.
Step 6: Pour Into Molds
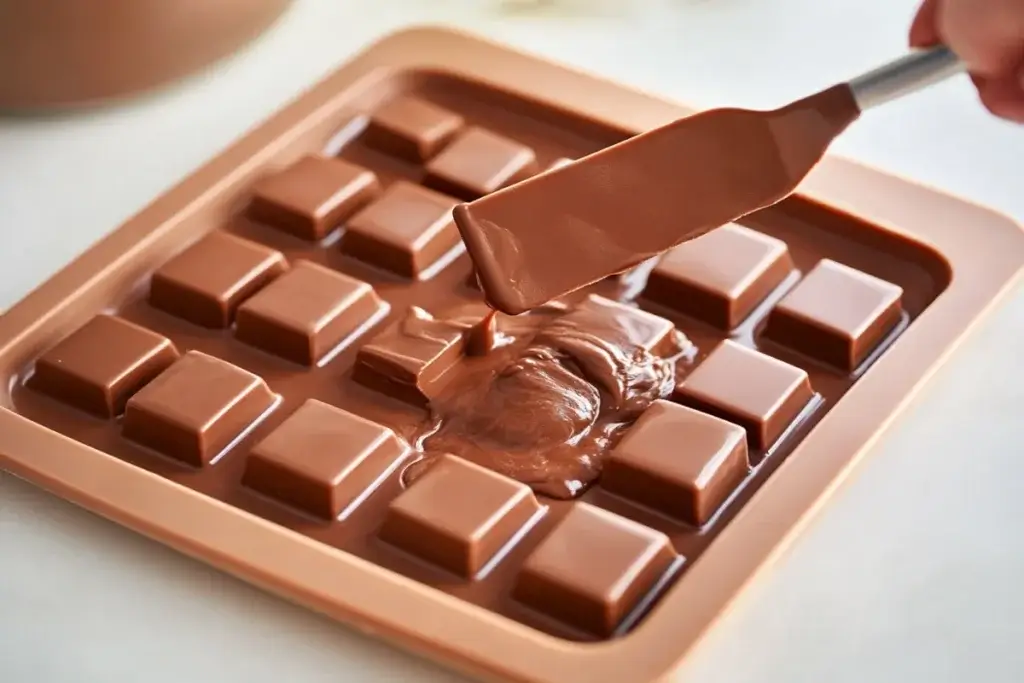
Pour the chocolate mixture into silicone molds.
Tap gently to remove air bubbles.
Step 7: Chill and Set
Refrigerate for 20–30 minutes until firm.
Store in an airtight container in the refrigerator.
How to Make Milk Chocolate Chips
If you want to turn this milk chocolate recipe into homemade chocolate chips, the process is very simple.
Instead of pouring the melted chocolate into thick molds, spread it into a thin, even layer on parchment paper or a silicone baking mat.
Let the chocolate cool at room temperature until it is partially set but still slightly soft. At this stage, use a knife to cut small chip-sized pieces.
Allow the chocolate to fully harden before separating the pieces. These homemade milk chocolate chips can be used in cookies, brownies, or as toppings for desserts.
For a more uniform shape, you can also pipe small drops of chocolate onto parchment paper and let them set completely.
How to Turn Dark Chocolate Into Milk Chocolate
If you only have dark chocolate at home, you can easily turn it into milk chocolate by adding milk powder and a small amount of sweetener.
To do this, melt the dark chocolate gently using a double boiler. Once fully melted, stir in milk powder (about 10–20% of the chocolate weight) and mix until smooth. If the mixture becomes too thick, add a small amount of melted cocoa butter to improve texture.
Taste and adjust sweetness if needed. Pour into molds and let it set as usual.
Keep in mind that the final texture may be slightly different from traditional milk chocolate, but this method creates a creamier and sweeter version of dark chocolate.
If you want to learn more about working with higher cocoa content, see our complete guide on how to make dark chocolate.
Milk Chocolate vs Dark Chocolate (Quick Comparison)
Milk chocolate and dark chocolate differ in sweetness, cocoa content, and texture. Here’s a simple comparison to help you understand the main differences.
| Feature | Milk Chocolate | Dark Chocolate |
|---|---|---|
| Cocoa Content | 10–50% | 50–90% |
| Milk Solids | Contains milk powder | No milk solids |
| Sweetness | Sweeter and creamier | Less sweet, more intense |
| Texture | Smooth and soft | Firmer and richer |
| Flavor Profile | Mild and creamy | Bold and slightly bitter |
| Best Uses | Snacking, desserts | Baking, intense flavor recipes |
Milk chocolate contains less cocoa than dark chocolate, which also means it typically has less caffeine. If you’re curious about caffeine levels, read our full guide on does milk chocolate have caffeine.
Why Does Homemade Milk Chocolate Turn Grainy?
Homemade milk chocolate can turn grainy if the ingredients are not properly combined or if the fat content is too low. A smooth, creamy milk chocolate texture depends on the correct balance of cocoa butter, milk powder, and finely powdered sugar.
Here are the most common reasons milk chocolate becomes grainy:
- Unsifted cocoa powder or milk powder – Lumps create a rough texture.
- Not enough cocoa butter – Fat is essential for a silky finish.
- Overheating the mixture – High heat can affect texture.
- Using granulated sugar instead of powdered sugar – Sugar crystals do not dissolve properly.
To make creamy milk chocolate at home, always sift dry ingredients, melt cocoa butter gently, and blend the mixture thoroughly. Using an immersion blender or food processor can significantly improve smoothness.
Dairy-Free Milk Chocolate Option
If you’re looking for a dairy-free milk chocolate recipe, you can easily adapt this homemade version.
Instead of regular milk powder, use coconut milk powder or oat milk powder. These alternatives provide a creamy texture while keeping the chocolate completely dairy free.
For the best results:
- Use high-quality cocoa butter
- Sift all dry ingredients
- Add 1–2 tablespoons of extra cocoa butter if the mixture feels too thick
Keep in mind that dairy-free milk chocolate may have a slightly different flavor depending on the plant-based milk powder you choose. Coconut milk powder creates a richer taste, while oat milk powder produces a more neutral, classic chocolate flavor.
This method allows you to enjoy smooth, creamy dairy-free milk chocolate without compromising texture.
Tips for Success
Making milk chocolate at home is straightforward, but these tips can help you avoid common pitfalls and achieve the best results:
- Always use powdered sweetener to prevent a gritty texture.
- Keep water away from the chocolate mixture to avoid seizing.
- Work in a cool, dry environment to prevent chocolate bloom (a white coating caused by fat or sugar separation).
If your chocolate does seize, don’t worry! Simply add a teaspoon of melted cocoa butter and stir until smooth.
Variations and Customizations
One of the best things about homemade milk chocolate is how customizable it is. Here are a few ideas to inspire your creativity:

- Flavor Additions: Enhance your chocolate with vanilla extract, coffee powder, or spices like cinnamon and chili.
- Textural Mix-Ins: Add chopped nuts, dried fruits, or crisped rice for a satisfying crunch.
- Dietary Modifications: Make a vegan version using coconut milk powder and maple syrup, or create a sugar-free option with stevia or erythritol.
Looking for more dessert ideas? Learn how to make Chocolate Cake Step-by-Step.
How to Use Homemade Milk Chocolate
Homemade milk chocolate is incredibly versatile. Here are some ideas for how you can enjoy it:
- Use it in baking recipes like cookies, brownies, and cakes.
- Melt it for a delicious chocolate fondue or ganache.
- Shape it into decorative molds for edible gifts.
- Chop it into chunks for ice cream or yogurt toppings.
Dive into unique recipes like the luxurious How to Make Dubai Chocolate.
Frequently Asked Questions
1. How is milk chocolate different from regular chocolate?
Milk chocolate differs from regular chocolate (like dark chocolate) primarily in its ingredients. Milk chocolate contains milk solids or milk powder, which give it a creamier texture and milder flavor compared to dark chocolate. Additionally, milk chocolate typically has a lower cocoa content (around 10-50%) and higher sugar content, making it sweeter and less bitter than dark chocolate. On the other hand, dark chocolate has little to no milk solids and a higher cocoa content, giving it a richer and more intense chocolate flavor.
How healthy is milk chocolate?
Milk chocolate can be enjoyed in moderation as part of a balanced diet. It contains beneficial compounds like antioxidants (though less than dark chocolate) and nutrients like calcium and magnesium from the milk. However, due to its higher sugar and fat content, it is less healthy than dark chocolate. Overconsumption of milk chocolate can lead to weight gain, cavities, and other health issues. Choosing homemade or high-quality milk chocolate with minimal additives can be a better option for those seeking a healthier treat.
How do you make milk chocolate at home?
To make milk chocolate at home, melt cocoa butter, then mix in cocoa powder, milk powder, and powdered sugar. Stir until smooth, pour into molds, and let it set. Using sifted ingredients helps achieve a creamy texture.
Can I use cocoa powder to make milk chocolate?
Yes, cocoa powder can be used to make milk chocolate. It must be combined with melted cocoa butter and milk powder to create a smooth and creamy consistency.
How to make milk chocolate without cocoa butter?
You can substitute cocoa butter with regular butter or coconut oil, but the texture will be softer and less authentic. Cocoa butter provides the best structure and snap.
How long does homemade milk chocolate last?
Homemade milk chocolate lasts up to two weeks in the refrigerator when stored in an airtight container. It can last up to three months if frozen.
How to make milk chocolate smooth and creamy?
To make milk chocolate smooth and creamy, sift all dry ingredients, use enough cocoa butter, and blend thoroughly. Avoid overheating and always use powdered sugar instead of granulated sugar.
¿Cómo hacer chocolate con leche en casa?
Muchos buscan cómo hacer chocolate con leche en casa de forma fácil y rápida. Esta versión casera es simple y no requiere maquinaria especial.
Hacer chocolate con leche casero es sencillo si utilizas manteca de cacao, cacao en polvo, leche en polvo y azúcar. Derrite la manteca, añade el cacao y la leche en polvo, mezcla hasta obtener una textura suave y vierte en moldes para enfriar. Puedes ajustar el nivel de dulzor según tu preferencia.
Conclusion
Making milk chocolate at home is not only a fun and rewarding experience, but it also allows you to create a healthier, more personalized version of this classic treat. With just a few simple ingredients and some easy steps, you can enjoy rich, creamy, and delicious chocolate that’s free of preservatives and tailored to your preferences.
So why not give it a try? Embrace your inner chocolatier, experiment with flavors, and treat yourself to the satisfaction of homemade milk chocolate. Share your creations with family and friends, or savor them all to yourself—you deserve it!
Print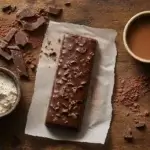
How to Make Milk Chocolate Like a Pro: Easy and Delicious
- Total Time: 14 minute
- Yield: Approximately 6 servings 1x
- Diet: Vegetarian
Description
This creamy and delicious homemade milk chocolate recipe is easy to make with just a few simple ingredients. Perfect for snacking, gifting, or as a base for desserts, it’s fully customizable to your taste and dietary preferences.
Ingredients
- 100g cocoa butter
- 30g unsweetened cocoa powder
- 50g milk powder (or coconut milk powder for a vegan option)
- 50g powdered sweetener (powdered sugar or sugar-free alternatives like erythritol)
- 1 pinch of sea salt (optional)
- 1 tsp vanilla extract (optional)
Instructions
- Prepare Ingredients: Sift the cocoa powder and milk powder to ensure a smooth texture. Measure all ingredients accurately.
- Melt Cocoa Butter: Place cocoa butter in a heatproof bowl over a double boiler. Stir until fully melted, taking care not to overheat.
- Combine Ingredients: Gradually whisk in cocoa powder, milk powder, and powdered sweetener. Stir continuously to prevent lumps. Add a pinch of salt or vanilla extract if desired.
- Optional: Temper Chocolate: If desired, temper the chocolate by heating it to 113°F (45°C), cooling it to 82°F (28°C), and reheating it to 90°F (32°C).
- Pour into Molds: Pour the smooth chocolate into silicone molds. Tap gently to remove air bubbles.
- Set and Store: Place molds in the fridge or freezer for 20-30 minutes to set. Remove from molds and store in an airtight container in the fridge for up to 2 weeks.
Notes
- For a vegan option, substitute milk powder with coconut milk powder.
- Customize your chocolate by adding nuts, dried fruit, or spices.
- Store chocolate in a cool, dry place to prevent bloom.
- Liquid sweeteners are not recommended as they may cause the chocolate to seize.
- Prep Time: 15M
- Cook Time: 10M
- Category: Dessert
- Method: Double boiler, mixing, and molding
- Cuisine: Global
Nutrition
- Serving Size: 1 serving (approximately 30g)
- Calories: 87 kcal
- Sugar: 6g
- Sodium: 10mg
- Fat: 7g
- Saturated Fat: 4g
- Unsaturated Fat: 2g
- Trans Fat: 0g
- Carbohydrates: 7g
- Fiber: 1g
- Protein: 1g
- Cholesterol: 0mg
Keywords: Homemade milk chocolate, milk chocolate recipe, DIY milk chocolate, creamy chocolate, vegan milk chocolate