
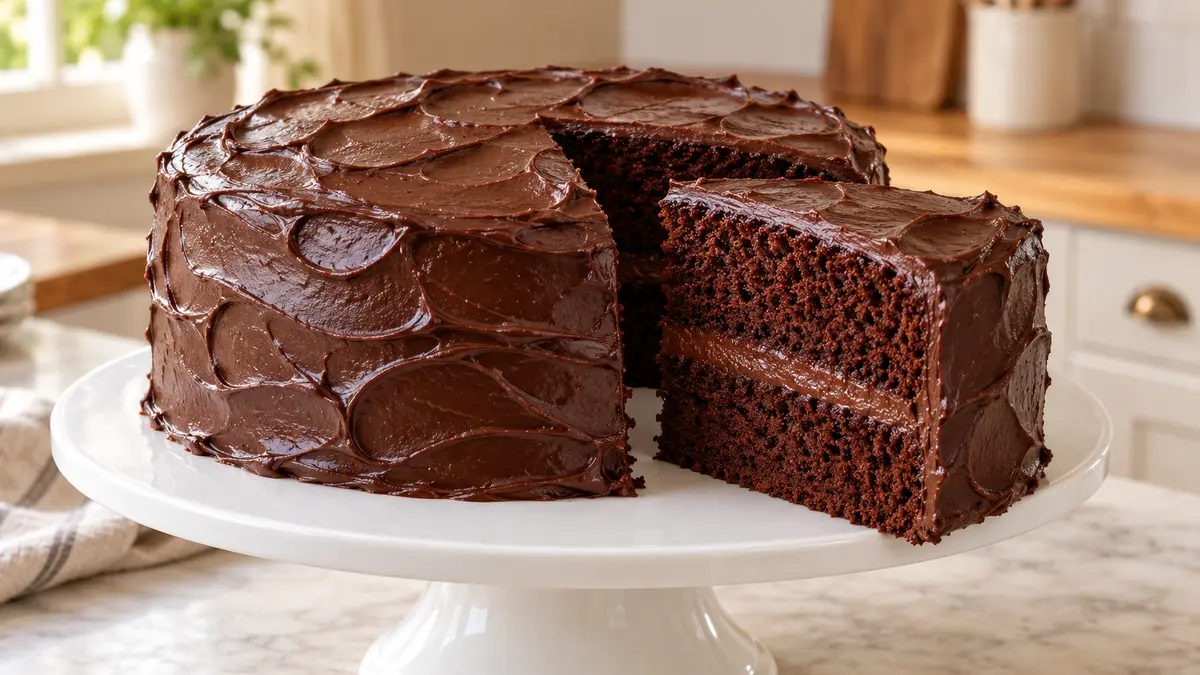
Matilda cake is a rich chocolate layer cake inspired by the enormous chocolate cake associated with Bruce Bogtrotter in Matilda. This homemade Matilda cake recipe pairs two cocoa cake layers with a thick chocolate ganache frosting for the dark, generously frosted look that makes the dessert recognizable.
The recipe uses two 9-inch round pans, a straightforward oil-and-buttermilk batter, and a frosting made with chopped chocolate, cream, and butter. You do not need an elaborate cake decoration: broad chocolate swirls and a substantial layer of frosting do most of the work.
Allow about 3 hours 10 minutes overall, including a flexible cooling allowance. The cake layers must be completely cool and the ganache spreadable before assembly, so use their actual condition rather than rushing to meet the clock. This is a proposed home formulation, not a kitchen-tested recipe or the official recipe used in the film.
Jump to: Recipe overview · Equipment · Bake the cake · Frosting.
What Is Matilda Cake?
The name usually describes a deeply chocolatey cake inspired by the famous cake scene involving Bruce Bogtrotter. Searches for Bruce Bogtrotter cake, chocolate cake from Matilda, and Matilda chocolate cake often lead to this same general baking idea.
There is no need to make an enormous cake to capture that appearance at home. Two round layers, dark chocolate frosting, and a simple finish give you a manageable celebration dessert that can be cut into about twelve slices.
This version uses ganache rather than a powdered-sugar buttercream. It is intended to have a substantial chocolate coating with a smooth, spreadable texture once cooled. The precise firmness depends on the chocolate, cream, and temperature in your kitchen.
If you want a more general cake with cocoa buttercream, our step-by-step chocolate cake recipe covers that style. Here, the focus is the Matilda-inspired chocolate finish and the practical steps for filling and frosting the layers.
Matilda Cake Recipe at a Glance
| Detail | This version |
|---|---|
| Cake pans | Two 9-inch round pans, at least 2 inches deep |
| Layers | Two |
| Oven | 350°F, conventional oven |
| Baking time | About 30-35 minutes; check for doneness |
| Active preparation | About 35 minutes, including frosting and assembly |
| Cooling allowance | About 2 hours, as needed |
| Planned total | About 3 hours 10 minutes |
| Yield | About 12 slices |
| Frosting | Chocolate ganache with cream and butter |
Some frosting preparation and cooling can happen while the cake layers bake or cool. The planned total is a scheduling estimate, not a guarantee that hot cake or liquid ganache will be ready for assembly at a particular minute.
Ingredients for Matilda Cake
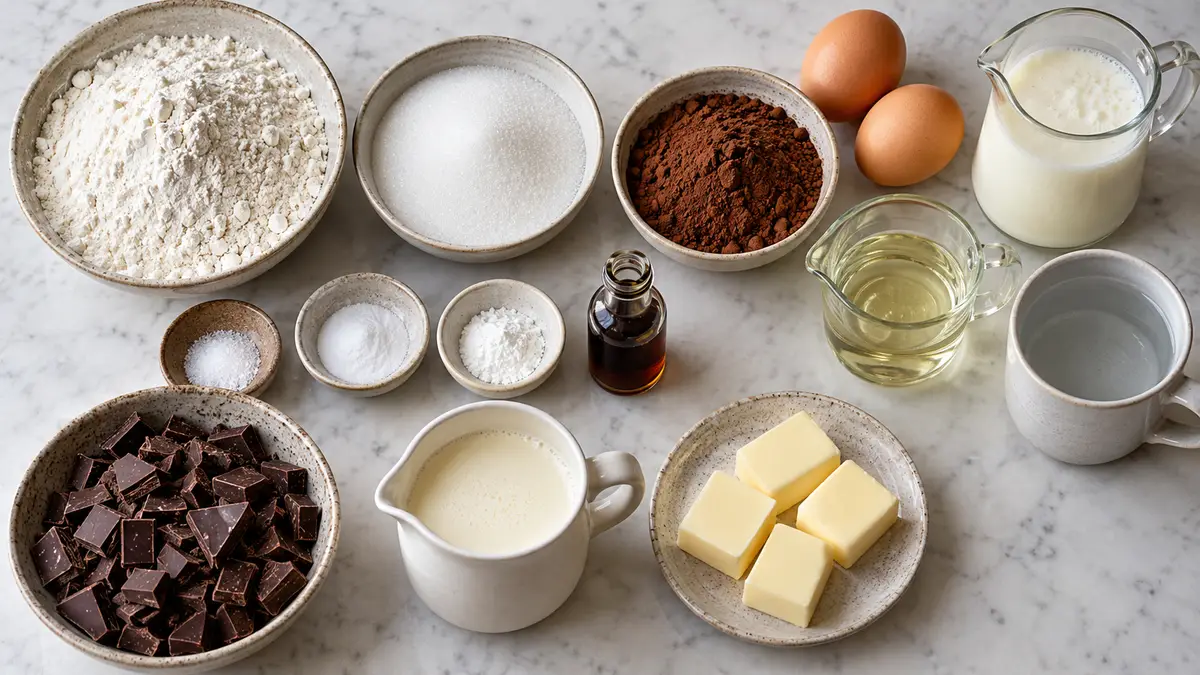
For the chocolate cake layers
- 2 cups all-purpose flour, 240 g. Weigh it if possible. If using cups, spoon flour into the cup and level it rather than packing it down.
- 2 cups granulated sugar, 400 g. Use regular granulated sugar for the base formulation.
- 3/4 cup unsweetened natural cocoa powder, about 65 g. This recipe specifies natural cocoa; do not assume a black cocoa or Dutch-process substitution will behave identically.
- 1 1/2 teaspoons baking soda. Measure level spoonfuls and break up any lumps.
- 1 teaspoon baking powder. Check that it is within its recommended usage period.
- 1 teaspoon fine table salt. Coarse salts vary in volume, so avoid an unmeasured substitution.
- 2 large eggs. Crack into a separate small bowl before adding.
- 1 cup buttermilk, 240 mL. Use plain dairy buttermilk for the listed version.
- 1/2 cup neutral oil, 120 mL. Choose a mild oil suitable for baking.
- 1 teaspoon alcohol-free vanilla flavoring. Check the product label and strength.
- 1 cup hot water, 240 mL. Add carefully after combining the other batter ingredients.
For the chocolate fudge-style ganache frosting
- 16 oz semisweet baking chocolate, about 450 g, finely chopped. Use a bar intended for melting, around 55-60% cacao, for the starting formulation.
- 1 1/2 cups heavy whipping cream, 360 mL. Use plain dairy cream.
- 4 tablespoons unsalted butter, about 57 g. Cut into small pieces so it incorporates more easily.
This frosting contains no confectioners’ sugar. The chocolate provides its sweetness and much of its body. Changing the type of chocolate changes both flavor and consistency, so white chocolate, milk chocolate, and very dark chocolate need their own adjustments.
Why the chocolate choice matters
A semisweet baking bar gives you a defined starting point. Chocolate chips can differ in their melting behavior, and products sold as candy coating are not necessarily interchangeable with baking chocolate.
Chop the chocolate into small, fairly even pieces before heating the cream. Large chunks can remain intact after the smaller pieces have melted, leading you to overheat the entire mixture to chase a few lumps.
Equipment and Pan Preparation
Use two 9-inch round cake pans at least 2 inches deep, parchment paper, a kitchen scale or measuring cups, two mixing bowls, a whisk, a heatproof bowl for ganache, a cooling rack, and an offset spatula or butter knife.
Grease the pans and line their bottoms with parchment rounds. Leave enough room around the pans for air to circulate in the oven. If both pans cannot fit sensibly on one rack, follow your oven’s guidance for baking on multiple racks and monitor them separately.
Do not pour this full quantity into two smaller pans without checking capacity. Different diameters and depths change batter thickness, baking time, and overflow risk. Keep this first version in the specified pans.
Print
Matilda Cake with Chocolate Fudge Frosting
- Total Time: 3 hours 10 minutes
- Yield: About 12 slices 1x
Description
A homemade Matilda-inspired two-layer chocolate cake with rich chocolate ganache frosting, made in two 9-inch pans.
Ingredients
Chocolate cake layers
- 2 cups all-purpose flour (240 g)
- 2 cups granulated sugar (400 g)
- 3/4 cup unsweetened natural cocoa powder (about 65 g)
- 1 1/2 teaspoons baking soda
- 1 teaspoon baking powder
- 1 teaspoon fine table salt
- 2 large eggs
- 1 cup plain dairy buttermilk (240 mL)
- 1/2 cup neutral oil (120 mL)
- 1 teaspoon alcohol-free vanilla flavoring
- 1 cup hot water (240 mL)
Chocolate ganache frosting
- 16 oz semisweet baking chocolate (about 450 g), around 55-60% cacao, finely chopped
- 1 1/2 cups heavy whipping cream (360 mL)
- 4 tablespoons unsalted butter (about 57 g), cut into small pieces
Instructions
- Heat a conventional oven to 350°F. Grease two 9-inch round pans at least 2 inches deep and line their bottoms with parchment.
- Whisk the flour, sugar, natural cocoa, baking soda, baking powder and salt in a large bowl, breaking up lumps.
- In a separate bowl, whisk the eggs, buttermilk, oil and alcohol-free vanilla. Stir into the dry ingredients just until combined, scraping the bowl.
- Gradually and carefully stir in the hot water. The batter will be thin; do not add extra flour.
- Divide evenly between the pans. Bake about 30-35 minutes, checking near 30 minutes. A toothpick near the center should have no wet batter, and the center should be set.
- Cool in the pans on a rack for about 10-15 minutes. Turn out carefully, remove parchment and cool completely.
- For the frosting, place chopped chocolate in a dry heatproof bowl. Heat the cream until steaming with small bubbles at the edges, without boiling vigorously. Pour over the chocolate and leave about 3 minutes.
- Stir gently until smooth. Stir in the butter pieces until incorporated. If needed, use very gentle additional heat to melt remaining chocolate pieces.
- Cool the ganache until spreadable and able to hold a soft ridge. Stir occasionally; refrigerate briefly in short intervals if needed. Cake layers must be completely cool before assembly.
- Place one layer on a serving plate and spread about one quarter of the ganache over it. Add the second layer, coat lightly to catch crumbs, then spread the remaining ganache over the top and sides with broad swirls.
Notes
Proposed home formulation, not kitchen tested or an official movie recipe. Yield about 12 slices. Active time includes frosting and assembly; a 2-hour cooling allowance is flexible, and actual readiness controls. Some ganache preparation and cooling can overlap with baking or cooling the layers. Use the specified natural cocoa and semisweet baking chocolate as the starting formulation; dietary substitutions are not tested one-for-one swaps. No added coffee or alcohol-based vanilla. Keep the finished cream-frosted cake covered in the refrigerator at 40°F or below and use within 3 days or shorter ingredient guidance. Limit time outside refrigeration to 2 hours, or 1 hour above 90°F.
- Prep Time: 35 minutes
- Cooling Time:
- Cook Time: 35 minutes
- Category: Dessert
- Method: Baking
- Cuisine: American
Nutrition
- Serving Size: 1 slice
Keywords: matilda cake recipe,matilda chocolate cake,Bruce Bogtrotter cake,chocolate fudge frosting
How to Make Matilda Cake
1. Prepare the oven and pans
Heat a conventional oven to 350°F. Grease and line the pans before mixing the batter, and arrange a rack near the center of the oven.
Measure all the ingredients first. The batter comes together quickly, and having the pans ready avoids leaving the mixed batter waiting while you cut parchment or search for a second pan.
2. Combine the dry ingredients
Whisk the flour, sugar, cocoa powder, baking soda, baking powder, and salt in a large bowl. Break up visible cocoa and leavener lumps so they are not carried into the batter.
Check the bottom and edges of the bowl as you whisk. Dark cocoa makes it easy to miss a pocket of pale flour, particularly in a deep bowl.
3. Add eggs, buttermilk, oil, and vanilla
In another bowl, whisk the eggs, buttermilk, oil, and alcohol-free vanilla flavoring until combined. Add this mixture to the dry ingredients and stir just until there are no broad streaks of dry flour.
Scrape the sides and bottom with a spatula. You are combining the batter, not trying to beat it until airy. Stop prolonged mixing once the ingredients are incorporated.
4. Stir in the hot water
Add the measured hot water gradually, whisking gently and carefully to avoid splashes. The batter will become noticeably thinner. Scrape the bowl again and stir until it looks evenly combined.
Do not add extra flour simply because the batter pours readily. This formulation includes a substantial amount of liquid. An unplanned flour addition changes the balance and may leave the finished cake denser than intended.
5. Divide and bake
Divide the batter evenly between the prepared pans, using a scale if convenient. Transfer them carefully to the oven so the liquid batter does not spill.
Bake for about 30-35 minutes, beginning to check near the earlier end of the range. A toothpick inserted near the center should come out without wet batter; a few moist crumbs are different from a liquid coating. The center should look set rather than visibly fluid.
Ovens and pans vary. If a layer needs longer, continue in short intervals and check again. Do not leave it in solely to reach the maximum time if it is already baked.
6. Cool the cake layers completely
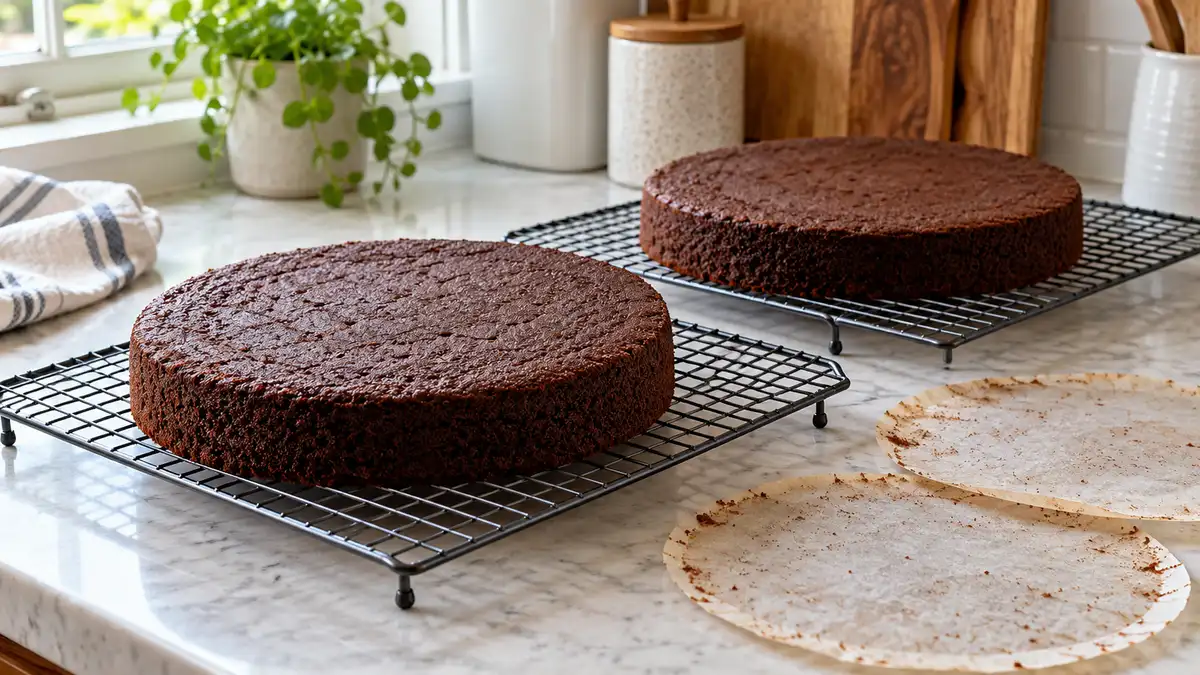
Let the layers stand in their pans on a rack for about 10-15 minutes. Loosen the edges carefully, turn them out, remove the parchment, and let them finish cooling on the rack.
Support the layers when moving them. A warm, tender cake can split if lifted by one edge. Wait until the centers and undersides have cooled before applying frosting.
How to Make the Chocolate Fudge Frosting
Heat the cream and melt the chocolate
Put the finely chopped chocolate in a dry heatproof bowl. Heat the cream in a small saucepan until hot and steaming, with small bubbles at the edges; do not let it boil vigorously or boil away.
Pour the hot cream over the chocolate and leave it undisturbed for about 3 minutes. Stir gently from the center outward until the mixture becomes glossy and combined. Add the small butter pieces and stir until incorporated.
If a few pieces remain unmelted, use very gentle additional heat, such as setting the bowl briefly over warm water, and stir again. Keep water out of the chocolate mixture and avoid scorching it with aggressive heat.
Cool to a spreadable consistency
Let the ganache cool, stirring occasionally, until thick enough to spread and hold a soft ridge from the spatula. It should not run straight off the cake like a warm sauce.
If needed, refrigerate briefly in short intervals, stirring and checking frequently. Do not assume a fixed number of minutes works for every bowl, chocolate brand, or room temperature.
If it becomes too firm, let it stand briefly or warm it very gently while stirring. Work toward a spreadable texture rather than repeatedly overheating and chilling the entire bowl.
This is a fudge-style ganache frosting, not a boiled sugar fudge. The name describes the rich chocolate finish, so there is no candy thermometer stage in the method.
Filling and Decorating the Cake
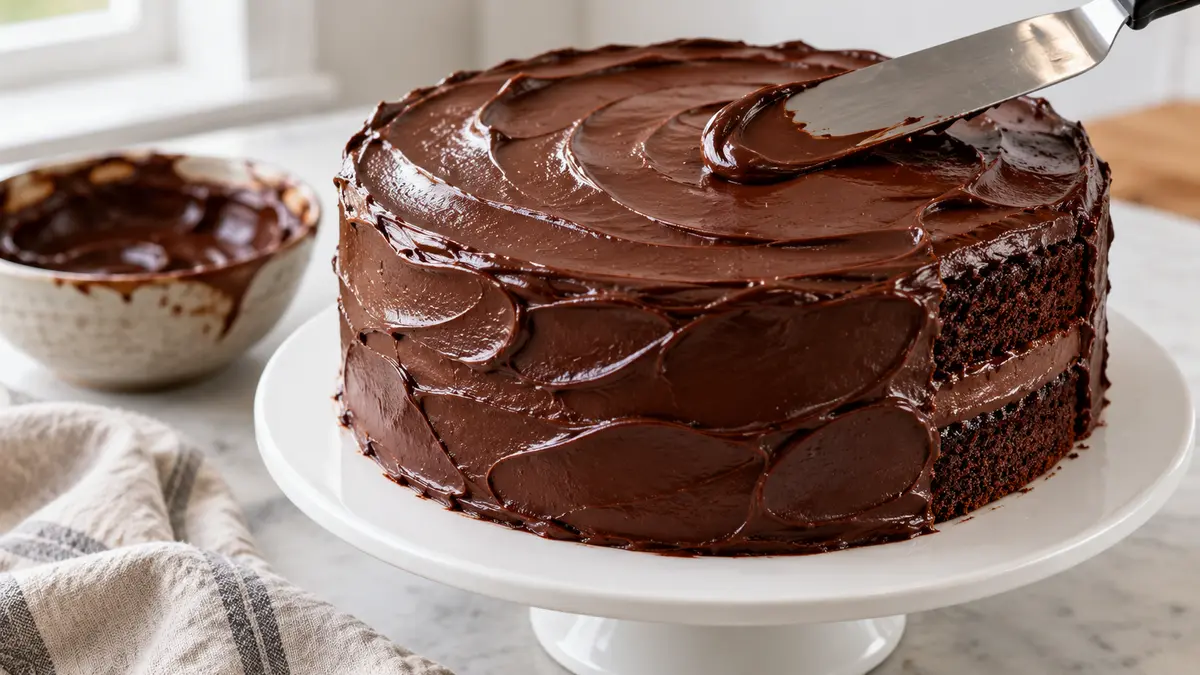
Place the first completely cooled layer on a serving plate. If it has a pronounced dome, trim only what is necessary to create a stable surface. Avoid cutting away large amounts just to chase a perfectly flat layer.
Spread roughly one quarter of the ganache over the first layer, stopping just short of the edge. Set the second layer on top and check that it sits level. Keep most of the remaining frosting for the top and sides.
Apply a thin coating to catch loose crumbs, then spread the rest of the ganache over the cake. Use broad spatula strokes to create a simple swirled finish. Keep the decoration chocolate-focused rather than covering the surface with unrelated toppings.
If the layers begin sliding, pause and check the temperatures. Warm cake and loose ganache make assembly difficult. Brief refrigeration can help a filled cake become easier to handle, but it does not replace cooling the layers properly before starting.
Troubleshooting Your Matilda Chocolate Cake
| Problem | What to check | What to change next time |
|---|---|---|
| Dry cake | Baking time and flour measurement | Weigh the flour and check doneness earlier |
| Sunken or wet center | Underbaking, pan size, or inaccurate measurements | Use the specified pans and check the center |
| Dense patches | Incomplete mixing or large dry lumps | Whisk dry ingredients and scrape the bowl |
| Frosting runs down the sides | Warm layers or warm ganache | Cool both to the appropriate condition |
| Frosting is too firm | Excessive chilling or different chocolate | Allow gentle warming before spreading |
| Layers slide | Too much loose filling or uneven layers | Use a restrained filling layer and cool appropriately |
Avoid changing several ingredients in response to one problem. Record the pan size, products, and actual baking time so you can identify what happened before the next batch.
Substitutions and Recipe Boundaries
Hot water keeps this base free of added coffee. If you choose to use brewed coffee instead, it changes the flavor and may add caffeine. Decaffeinated coffee is not necessarily caffeine-free, and chocolate itself should not be described as free of caffeine.
Do not replace natural cocoa with black cocoa solely to make the cake darker. The flavor, acidity, and absorption may differ. A dark chocolate frosting already gives the cake a substantial chocolate appearance.
Egg-free, gluten-free, and dairy-free versions need suitable formulations. Removing eggs, changing flour, or replacing both buttermilk and cream is more than a cosmetic adjustment. Those variations are not presented as tested one-for-one swaps here.
For another type of chocolate layer dessert, our Mounds cake recipe explores a coconut-and-chocolate direction. It has a different flavor goal from this Matilda-inspired cake.
Make-Ahead, Storage, and Serving
You can bake the layers ahead and wrap them once completely cool. For longer preparation schedules, freezing the unfrosted, well-wrapped layers is more practical than leaving them exposed while you wait to assemble the cake. Thaw them while wrapped before decorating.
Keep the finished cream-frosted cake covered in the refrigerator at 40°F or below, using a container that protects the frosting. As a conservative home limit, use within 3 days, or follow any shorter ingredient-specific guidance.
Before serving, allow individual slices a short time to soften if desired, while keeping overall time outside refrigeration limited. Do not leave the whole cake on a warm party table for hours. General FDA food-storage guidance recommends refrigerating perishables promptly and limiting room-temperature time to 2 hours, or 1 hour above 90°F.
For neater slices, use a clean sharp knife and wipe it between cuts. The estimated twelve servings can be divided into smaller pieces for a dessert buffet. Portion size changes the number of servings and any nutrition calculation.
If you prefer a different everyday baking format, this kefir sheet cake recipe offers another direction. Follow that recipe’s pan and ingredient guidance rather than transferring this layer-cake batter into an unspecified sheet pan.
FAQS
What is the cake from Matilda called?
It is commonly called Matilda cake, Matilda chocolate cake, or Bruce Bogtrotter cake. Those names refer to the chocolate cake associated with the story’s cake scene and to homemade versions inspired by it.
Is this the official Matilda movie cake recipe?
No. This is a proposed homemade interpretation with two chocolate layers and a ganache frosting. It is not presented as the recipe used by the film production or a licensed bakery copycat.
What frosting goes on Matilda cake?
Homemade versions vary. This recipe uses semisweet chocolate, heavy cream, and butter to make a rich, spreadable ganache with a fudge-style finish. It is different from cocoa buttercream made with confectioners’ sugar.
Can I make Matilda cake without coffee?
Yes. This recipe uses hot water. No coffee is needed. Chocolate can contain caffeine, so omitting coffee does not make the entire dessert caffeine-free.
What size cake pans should I use?
Use two 9-inch round pans at least 2 inches deep. Smaller pans change batter depth and baking time. Do not transfer the full batch into smaller containers without checking capacity and adapting the preparation.
Why is the chocolate cake batter so thin?
The hot water makes this batter pourable. Do not automatically add extra flour to thicken it. Confirm the measurements and use the specified pans rather than changing the balance after mixing.
Why is my ganache frosting too runny?
It may still be warm, or the chocolate and cream may differ from the specified products. Let it cool until spreadable, checking and stirring. Apply it only to fully cooled layers.
Can I make the cake a day ahead?
Yes. Cool the cake layers completely before wrapping or frosting. Keep the assembled cream-frosted cake covered in the refrigerator and follow the storage guidance above.
Can I make this recipe eggless or dairy-free?
Those changes need a suitable formulation. The listed cake uses eggs and buttermilk, and the ganache contains cream and butter. No tested egg-free or dairy-free replacement method is supplied here.
How many servings does this Matilda cake recipe make?
About twelve slices from a two-layer 9-inch cake. Actual servings depend on how you cut it. No numerical nutrition panel is supplied without calculating from the specific ingredients and portion sizes used.
1 thought on “Matilda Cake Recipe: Rich Chocolate Cake with Fudge Frosting”