
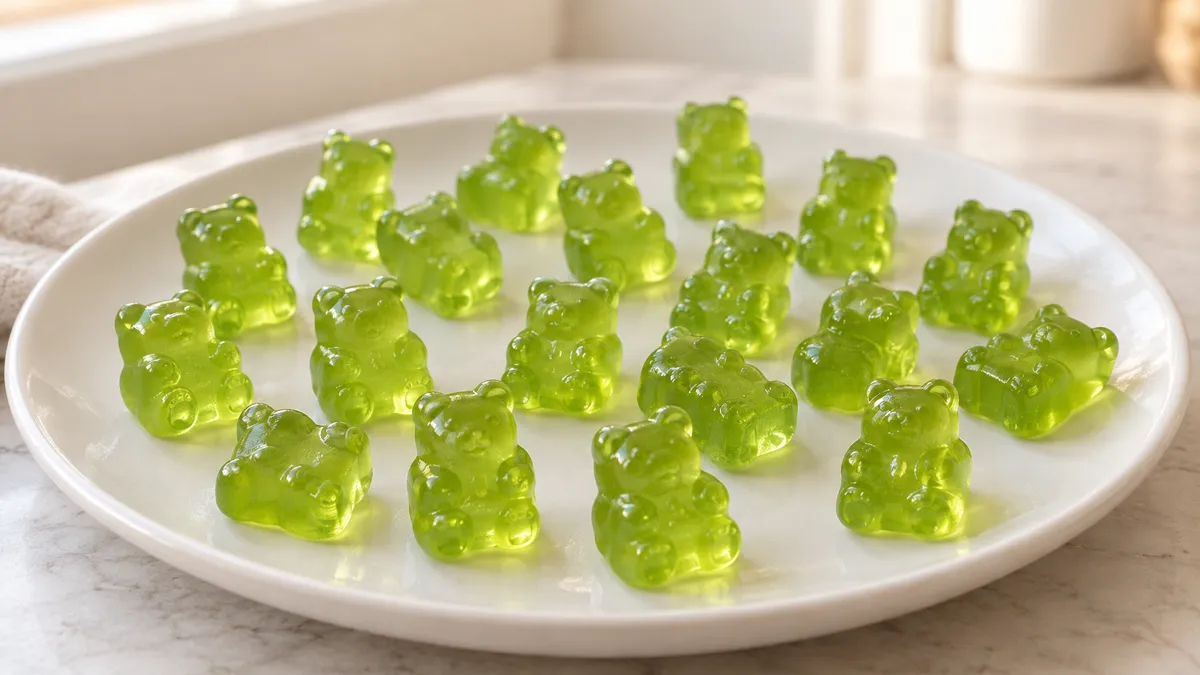
These homemade Jolly Rancher gummies turn fruity hard candy into small, soft gelatin sweets using just three ingredients: Jolly Rancher hard candies, water, and unflavored gelatin. Choose one candy flavor for a bright, consistent batch, dissolve it gently, then pour the mixture into silicone molds and refrigerate until firm.
Expect a tender, springy homemade gummy with the flavor of the candies you choose. The texture will differ from the bagged Jolly Rancher Gummies sold in stores. Those are a separate product with their own manufacturing process; this recipe starts with the brand’s hard candy and adds gelatin at home.
Recipe note: This formulation has not been kitchen-tested; yield and timing are estimates. Green apple, watermelon, cherry, grape, and blue raspberry each work as a single-flavor direction. Start with one small batch before making a mixed assortment, especially if you are using a new mold.
Jump to: Recipe card · Ingredients · Instructions · Troubleshooting.
Jolly Rancher Gummies Recipe at a Glance
| Detail | Recipe information |
|---|---|
| Preparation | 10 minutes, including blooming the gelatin |
| Cooking | About 10 minutes |
| Refrigeration | At least 2 hours, or until firm throughout |
| Total time | About 2 hours 20 minutes |
| Estimated yield | About 30 to 36 gummies in 5 mL cavities; mold size and evaporation affect yield |
| Method | Stovetop and refrigerator |
| Main ingredients | Hard candy, water, unflavored gelatin |
This is a small batch designed for home snacking. Weigh the unwrapped candies and gelatin for the most useful starting point. Counting individual candies is less reliable because piece size and broken pieces can vary.
What Are Homemade Jolly Rancher Gummies?
In this recipe, the hard candies supply the sweetness, color, and fruit flavor. Water dissolves the candy, and unflavored gelatin creates the set. There is no flavored gelatin dessert mix in the ingredient list, so you do not need to find a matching branded gelatin box.
The distinction between homemade and packaged gummies matters. Hershey’s current U.S. Original Flavors Gummies product page lists modified cornstarch in its formula and does not list gelatin. This homemade version deliberately uses gelatin and should be labeled accordingly when shared.
For a fuller explanation of packaged candy labels, read Do Jolly Rancher Gummies Have Gelatin?. Keep that guide handy if you are shopping for someone with a dietary requirement; the recipe below does not establish whether a particular retail product meets their needs.
Ingredients for Jolly Rancher Gummies
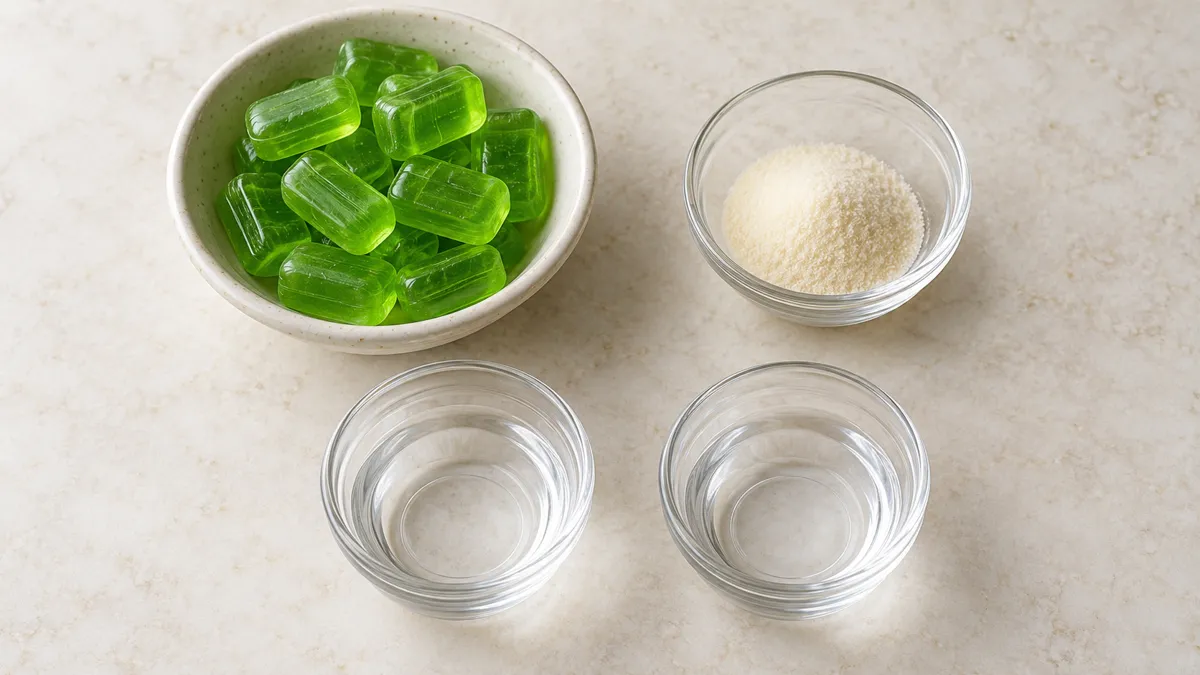
1. Jolly Rancher hard candies
Use 100 g unwrapped Jolly Rancher hard candies, preferably all one flavor. Buy the hard candy product, rather than gummies, filled bites, or chews. The official hard candy page can help identify the product, but the package in your hand remains the reference for its current ingredients and allergen statement.
Sorting by flavor keeps the final color more predictable. A saucepan containing several different colors may produce a muted color rather than a rainbow. To make distinct red, green, and blue sweets, prepare separate batches and keep their mixtures separate.
2. Water
Measure 1/2 cup water, 120 mL total, then divide it into two equal portions. Use 1/4 cup, 60 mL, cold water to bloom the gelatin and the remaining 1/4 cup, 60 mL, to dissolve the candy.
The divided measurement matters. Adding an extra half cup later would dilute the mixture and change the set. Set both measured portions beside the stove before starting, and avoid topping up the saucepan simply because the candy takes a few minutes to dissolve.
3. Unflavored powdered gelatin
Use 14 g unflavored powdered gelatin. This equals two envelopes only when each envelope contains 7 g; check your package instead of assuming every pouch is identical. Weigh gelatin from a larger container.
Use standard powdered gelatin for this formulation. Collagen peptides do not replace gelling gelatin, and agar powder is not a direct substitute. Different gelling ingredients need different quantities and preparation methods, so changing them would require a separately developed recipe.
Equipment You Will Need
- A small, heavy-bottomed saucepan.
- A small heatproof bowl for blooming gelatin.
- A digital kitchen scale and liquid measuring cup.
- A silicone spatula or spoon.
- Food-grade silicone gummy molds with approximately 5 mL cavities.
- A rimmed tray that fits in your refrigerator.
- A heatproof pouring jug or suitable food-safe dropper.
Set the empty molds on the tray before filling them. Flexible molds are awkward to lift once full, and a rigid support helps prevent spills on the way to the refrigerator. Wash and dry the molds first; pooled rinse water would dilute individual gummies.
You can measure one cavity with water to estimate its capacity. A mold sold as a gummy bear mold may have much smaller cavities than another brand, so a promised piece count is less useful than the cavity volume.
Print
Homemade Jolly Rancher Gummies
- Total Time: 2 hours 20 minutes
- Yield: 30 to 36 gummies (estimated) 1x
Description
Soft homemade gelatin gummies made with Jolly Rancher hard candy. This formulation has not been kitchen-tested; timing and yield are estimates.
Ingredients
- 100 g unwrapped Jolly Rancher hard candies, one flavor
- 1/2 cup (120 mL) water, divided into two 1/4 cup (60 mL) portions
- 14 g unflavored powdered gelatin
Instructions
- Set clean, dry silicone gummy molds on a rigid tray. Use molds with approximately 5 mL cavities.
- Sprinkle gelatin over 1/4 cup (60 mL) cold water in a small bowl. Let hydrate for 5 to 10 minutes while dissolving the candy.
- Warm hard candies with the remaining 1/4 cup (60 mL) water in a small saucepan over low to medium-low heat, stirring gently until no hard pieces remain, about 8 to 10 minutes. Avoid vigorous boiling and excessive evaporation.
- Remove from heat. Stir in bloomed gelatin until fully dissolved. If needed, return briefly to the lowest heat; do not boil after adding gelatin.
- Skim obvious foam. Carefully fill molds with the warm mixture using a heatproof jug or suitable dropper.
- Refrigerate for at least 2 hours, or until firm throughout. Peel silicone away gently to unmold. Store covered in the refrigerator.
Notes
Use hard candy, not packaged gummies or chews. Contains gelatin. This is an independent homemade recipe, not the commercial Gummies formula. Estimated yield is 30 to 36 pieces with 5 mL cavities; actual yield varies. Refrigerate covered at 40°F (4°C) or below and plan to use within 3 days, a conservative home handling recommendation rather than a validated shelf life. Not suitable for unrefrigerated storage. Images are AI-generated illustrations.
- Prep Time: 10 minutes
- Chill Time:
- Cook Time: 10 minutes
- Category: Dessert
- Method: Stovetop and Refrigeration
- Cuisine: American
Nutrition
- Serving Size: 1 gummy
Keywords: Jolly Rancher gummies recipe,homemade Jolly Rancher gummies,gummies with hard candy
How to Make Jolly Rancher Gummies
1. Prepare the molds and candies
Clear a level space in the refrigerator for the tray. Arrange clean, dry silicone molds on it. Unwrap the candies, sort them by flavor, and weigh out 100 g for the batch.
You do not need to grind the hard candy into powder. Dissolving whole pieces takes patience, but it avoids sending hard fragments across the counter. If pieces are already broken, include them in the measured weight.
2. Bloom the gelatin
Pour 1/4 cup, 60 mL, cold water into the small bowl. Sprinkle the 14 g gelatin evenly over its surface, rather than dropping it into one mound. Let it stand for 5 to 10 minutes while you begin dissolving the candy.
The gelatin should absorb the water and become thick and sponge-like. If a patch of dry powder remains, gently fold it into the wet portion. Blooming gives the powder a chance to hydrate before it meets the warm syrup.
3. Dissolve the hard candies
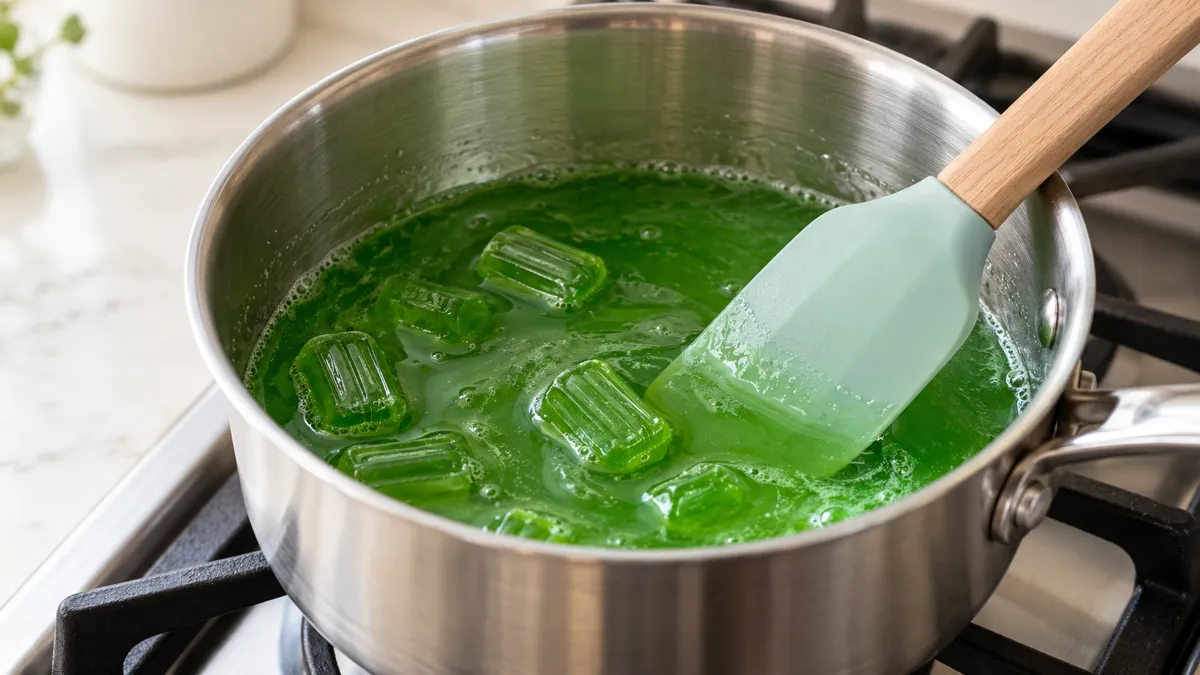
Place the remaining 1/4 cup, 60 mL, water and the 100 g candies in the saucepan. Warm over low to medium-low heat, stirring gently, until the hard pieces have dissolved. Allow about 8 to 10 minutes, adjusting the heat to keep the mixture from boiling vigorously.
Use the appearance of the mixture as your guide: there should be no hard candy pieces left against the bottom of the pan. This step dissolves the candy in water; it does not involve cooking a new hard-crack candy syrup to a high temperature.
If the water is rapidly evaporating before the candies dissolve, reduce the heat. Keep watching the pan, because a small amount of liquid can reduce quickly in an oversized saucepan.
4. Dissolve the bloomed gelatin
Remove the saucepan from the heat. Add the hydrated gelatin and stir slowly until it has melted into the candy mixture. Scrape the bowl so the full measured quantity goes into the pan.
If small gelatin pieces remain, return the saucepan to the lowest heat briefly and stir until smooth. Avoid boiling after adding the gelatin. You want a uniform pourable mixture, without visible granules or strings of undissolved gelatin.
Slow stirring is more useful than vigorous whisking here. Whisking can introduce a layer of bubbles that becomes noticeable on the finished surface. A few bubbles will not prevent setting, but a thick foam makes the molds harder to fill evenly.
5. Fill the gummy molds
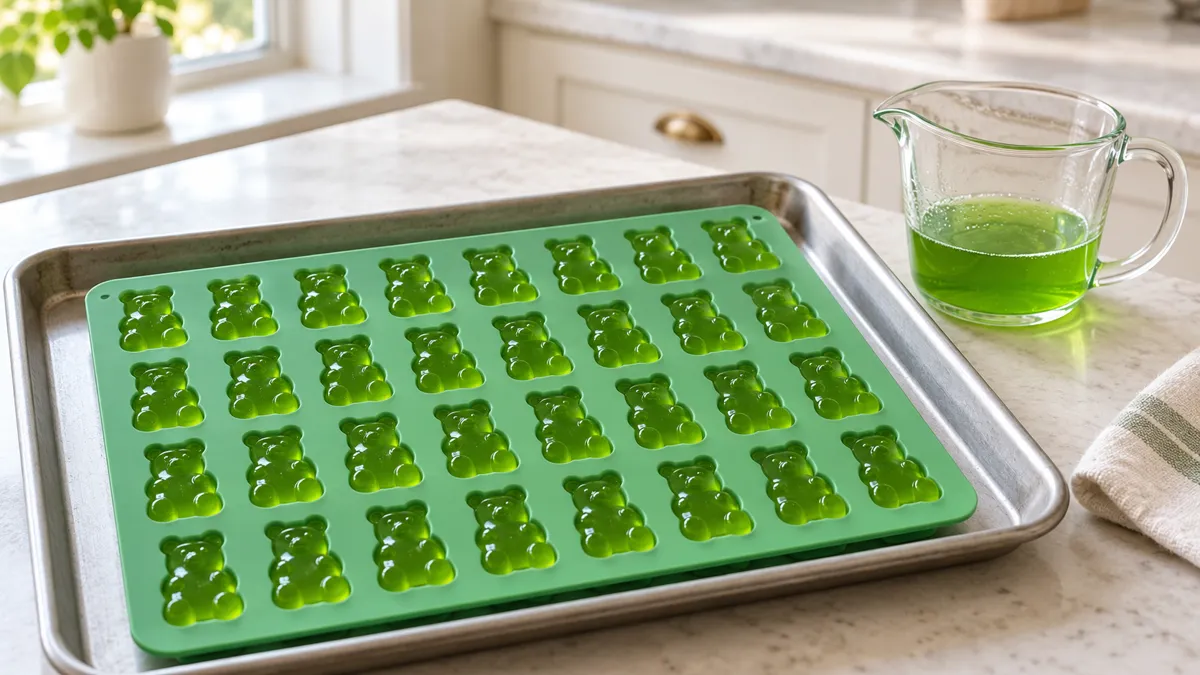
Let large surface bubbles rise briefly, then skim away any obvious foam with a spoon. Carefully transfer the warm mixture to a heatproof pouring jug, or use a suitable dropper to fill the cavities. The mixture and pan can burn, so handle them as hot cooking equipment.
Fill each cavity consistently without overflowing onto its neighbors. Work steadily: as the mixture cools, it will begin to thicken. If the remaining mixture starts setting in the pan, warm it gently just until it flows again instead of adding more water.
6. Refrigerate until completely set
Move the tray to the refrigerator and chill for at least 2 hours. Larger or deeper cavities may take longer. Test one gummy before unmolding the whole batch; it should release in one piece and feel firm through its center.
To unmold, ease the silicone away from the edges and push gently from underneath. Pulling hard on a narrow bear’s head or tail can tear a gummy that has not fully set. If the first piece stretches or breaks, return the tray to the refrigerator and try again later.
Tips for a Better Homemade Gummy Texture
Keep the batch size small at first
A first batch tells you how your gelatin and mold behave together. Record the candy flavor, gelatin brand, cavity size, and actual yield. Those details are more useful for repeating a result than a general instruction to add a little more gelatin next time.
Double the recipe only after you are comfortable filling your molds. A larger batch may start thickening before every cavity is filled, especially if you are working with a small dropper.
Aim for soft and springy
These are refrigerated homemade gelatin sweets. Expect more tenderness and less of the dense, shelf-stable chew found in many manufactured gummies. Leaving them uncovered on the counter is not a validated way to recreate a commercial candy process.
The moisture content, gelling system, and finishing steps of a factory-made gummy are different. Keep your comparison focused on the fruit flavor and the convenience of a small homemade batch.
Keep the ingredient measurements consistent
More water generally changes both firmness and flavor intensity. More gelatin can make the result harder or more rubbery. Rather than changing both at once, make the written version first and note what you would like to adjust in a later small trial.
Gelatin strength can also differ among products. The recipe calls for powdered gelatin by weight, but identical weights do not guarantee identical results across every brand and manufacturing specification.
Flavor Ideas and Optional Finishes
Green apple: Make a single green batch and serve it alongside another apple dessert. If you would rather have a spoonable gelatin dessert, try Green Apple Jello, which uses a different formulation and liquid ratio.
Watermelon or cherry: These are straightforward single-flavor choices for pink or red gummy molds. The candy supplies the color; extra food coloring is not part of the base recipe.
Blue raspberry or grape: Keep each flavor separate for a more recognizable color. Mixing purple and blue candy together will give you a blended batch rather than two distinct flavors.
Mixed assortment: Prepare two or three separate batches, refrigerate each until firm, then arrange the finished gummies together for serving. Keep a note of which color corresponds to each flavor.
Sugar coating: If you want to try a sugar finish, coat one chilled gummy immediately before serving and check the result. Moist gelatin surfaces can dissolve sugar, leaving a sticky coating. Do not coat the entire stored batch in advance.
Sour finish: A sour coating needs its own balance of sugar and food-grade acid. It is not included in this three-ingredient formulation. Avoid adding an unmeasured amount of citric acid directly to the warm gelatin mixture and expecting the same set.
Troubleshooting Homemade Jolly Rancher Gummies
| Problem | What to check | What to do |
|---|---|---|
| Gummies are too soft to release | Chilling time, cavity depth, gelatin weight, total water | Chill longer first; check your measurements before changing the next batch |
| Pieces feel rubbery | Too much gelatin or substantial evaporation | Use a scale and gentler heat for the next batch |
| Hard flecks remain | Candy was not fully dissolved | Fully dissolve the hard candy before adding gelatin |
| Small gelatin lumps remain | Uneven blooming or incomplete dissolving | Hydrate evenly and warm gently until smooth before filling |
| Bubbly surfaces | Vigorous whisking or shaking | Stir slowly and skim surface foam before pouring |
| Gummies tear | Early unmolding or delicate mold details | Chill longer and peel the silicone away gently |
| Sugar coating becomes wet | Moisture dissolving the coating | Store uncoated and finish a small serving at the last moment |
If a batch never firms properly, do not assume the solution is always more gelatin. First confirm that you used gelling gelatin rather than collagen powder, measured only 120 mL total water, and allowed enough refrigeration time. A written record makes the next attempt easier to assess.
How to Store Homemade Gummies
Once set, transfer the gummies to a clean, covered container and refrigerate. Use parchment between layers if the pieces stick. For this unvalidated home formulation, make a small quantity and plan to use it within 3 days; this is a conservative handling recommendation, not a laboratory-established shelf life.
Keep the refrigerator at 40°F, 4°C, or below. The FDA’s food storage guidance recommends refrigerating perishable foods within two hours, or one hour when the temperature exceeds 90°F, 32°C. Treat these water-containing homemade sweets as refrigerated food rather than sealed commercial candy.
Serve a small amount and leave the rest chilled. Do not package this recipe as an unrefrigerated mail-order gift or claim that it will keep for weeks in a candy jar. Freezing may change the texture after thawing, so a fresh small batch is the more practical starting point.
FAQS
Can you make gummies from Jolly Rancher hard candies?
Yes. Dissolve the hard candies in measured water, combine the warm mixture with bloomed unflavored gelatin, then fill molds and refrigerate. This produces homemade gelatin gummies with the candy’s flavor, rather than an exact recreation of the packaged Gummies product.
Do I need Jolly Rancher flavored gelatin mix?
No. This recipe uses hard candies for flavor and unflavored powdered gelatin for setting. A flavored dessert mix has a different composition and should not replace the gelatin by weight.
Can I use store-bought Jolly Rancher Gummies instead of hard candy?
Use hard candy for this formulation. Packaged gummies use a different recipe, and melting them into the same amount of water would not provide a predictable substitute.
How much gelatin do I need?
The proposed batch uses 14 g powdered unflavored gelatin with 100 g hard candy and 120 mL total water. Two envelopes equal 14 g only if each package contains 7 g.
Are these homemade gummies vegan?
No. This recipe contains gelatin. Replacing it with agar or pectin would require a different formulation and method; neither is a direct substitution here.
Can I make different flavors in one batch?
Combining candy flavors in the saucepan creates one blended flavor and color. For an assortment with distinct flavors, make separate batches and combine the finished, set pieces for serving.
Why are my gummies softer than store-bought candy?
This is a water-containing refrigerated gelatin recipe. Commercial gummies may use different gelling ingredients, controlled moisture levels, and finishing processes. Expect a tender homemade texture rather than an identical factory-made chew.
Can I make this recipe without molds?
You can pour the mixture into a small silicone container and cut it after it sets. Choose a container that gives a shallow layer; changing the depth changes chilling time and the resulting piece count.
Do homemade Jolly Rancher gummies need refrigeration?
Yes, refrigerate this version in a covered container. Its shelf stability has not been established, so the storage directions for an unopened commercial candy bag do not apply.
Can I make these ahead for a party?
Make a small batch the day before, keep it refrigerated, and unmold once firm. Serve in small portions and keep the remaining gummies cold. Label the homemade version as containing gelatin.
1 thought on “Homemade Jolly Rancher Gummies: Easy 3-Ingredient Recipe”